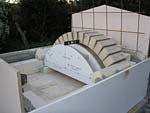
MTo firebrick Arches part 2/3 building sequence
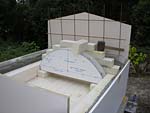
Making inner firebrick arches/vault part.
Masterly Tail oven design (3G MTo) – 3G MTo Main Page
Pointers:
1. Due to the very long/clear photo sequence for the firebrick part building, to show as many details as possible, from as many different angles as possible, the whole progress is split into 3 sections:
Page ONE – Page TWO – Page THREE
2. The firebrick hearth floor section has its own page.
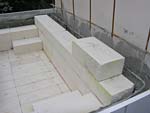
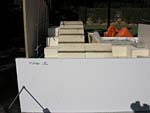
6. MTo firebrick Arches – Part 2 of 3
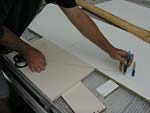

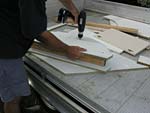
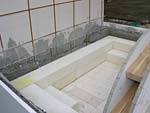
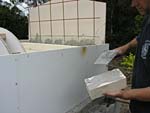
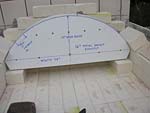
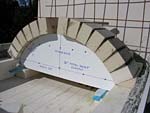
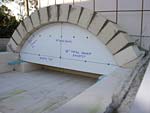
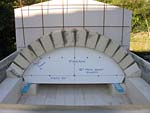
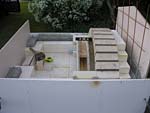
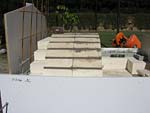
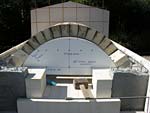
Images #0909 to #0976 – these are wooden arch template related, only 6 here because there is another very detailed page I made specially for “making firebrick arch templates” – Arch making matters like how long is the string, how to align bricks into an arch line, how to draw a very accurate brick arch line, cutting it out and finally how to put the wooden template together for the actual use. In terms of arches making – if you can hold a pen and a jig-saw, then you will make a very precise nice looking templates, as many templates as you wish. To me it takes 1 hour to make an accurate wooden template (add to it plus 1/2 hr to one hour measuring), I made many of various templates already.

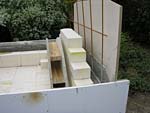
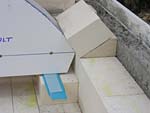
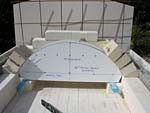
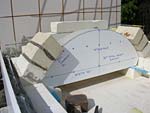
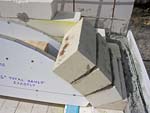
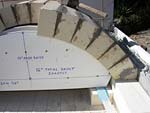
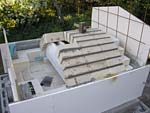
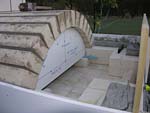
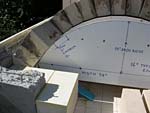
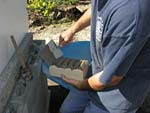
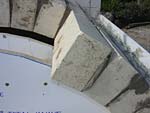
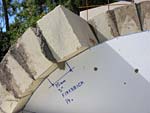
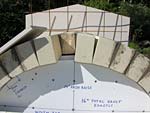
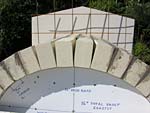
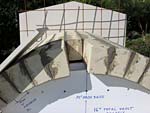
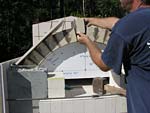
At what angle are we cutting the skew bricks that form the base of the arch on each side?
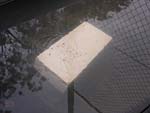
It’s very easy and quick to create these skew firebricks, example on the image #1004
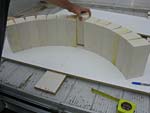
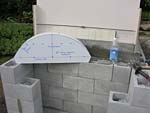
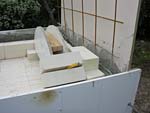
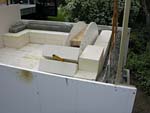
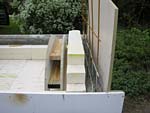
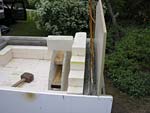
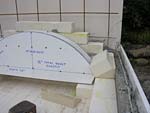
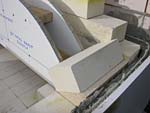
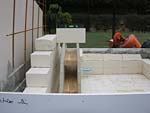
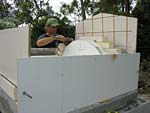
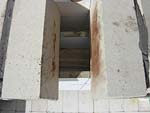
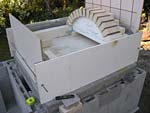
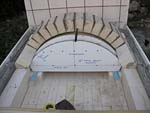
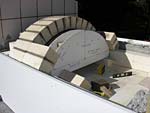
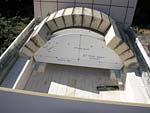
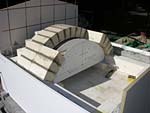
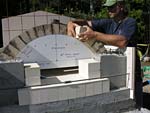
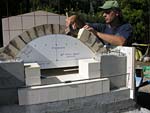
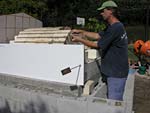
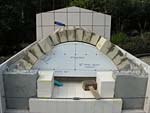
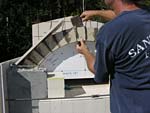
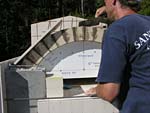
1. First place the wooden arch template in place between both side walls and set it into position – image #0985
2. Then temporarily place one firebrick in the first spot of the arch and hold it in there, it will perfectly show you the accurate angle of the arch firebrick to the horizontal arch firebrick.
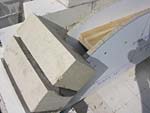
3. Put a piece of a cardboard onto these the two bricks and mark the accurate angle lines. Cut it out with scissors and you have an impression template of triangular shape.
4. By using your template mark the lines onto a firebrick with sharp pencil (a pen works too) to make the skew firebricks.
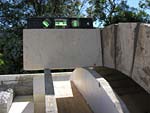
Like on images #1181, #1182 and #1183 (showing on the next page for oven firebrick entrance details.)
5. Do the same on the other side (or at least double check the other side angle even-though it should be the same in mirror image.)
* I cut these using a quality diamond masonry cutting wheel on a small hand-held angle grinder, one cut per side. Keep the off cut triangular pieces for finishing the oven entrance.
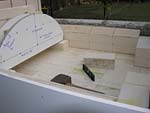


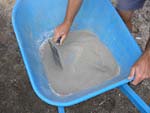
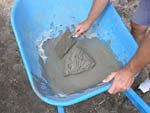

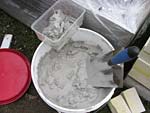
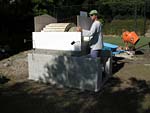
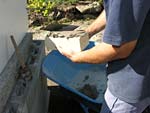
Images #1020 and #1026 to #1029 – show mixing refractory mortar for work with firebricks and what this particular heat resistant mortar consists of – measured in volume parts to keep the appropriate mixing ratio. I will describe these individual pictures in detail, but there is also the refractory mortar page with extra details.
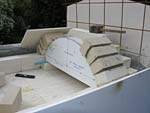
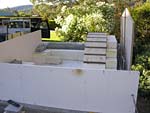
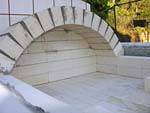
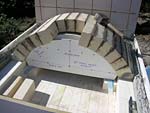
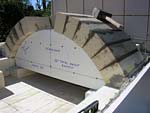
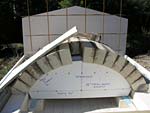

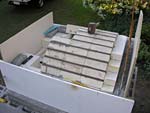

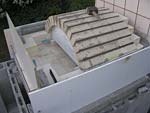
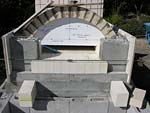
This page contains 93 images focused on making “MTo firebrick dome arches”.
Complete firebrick part building sequence has 613 (out of 2,785 all up) images: #0697 – #1309
Firebrick oven stages: Floor – Walls – Arches – Dome Entrance
3G MTo main page.
There is also the Swishy oven and the Original MTo design to consider or just to look at these too before building this 3G MTo.
Respond to the MTo firebrick Arches part 2/3 building sequence article:
16 Comments
Sorry, the comment form is closed at this time.
The more I see the more I like this new design.
Can’t wait for the full version!!!
By Rich G
Hi Rich,
Thanks. What particular do you like on this design?
I intend to put many images on these pages so the building details are clearly visible. If there is a specific question I will dig for a more appropriate picture to add it here. However, all 2,785 photographs cannot go on website so they will be available all, in large photo format at the same time, for download and on dvd. Swishy oven and original MTo design both building plans are already being downloaded – details in their info page (disk and download versions are exactly the same in content/size.)
By Rado
Greetings Rado,
I have a question about the height of the walls in the oven, you are using 3″ (75mm) firebrick stacked 2 high to be the upright portion of the wall before starting the arch. The firebrick here is 2.5″ (64mm?) would it be better to bevel the next brick with 1″ vertical before the bevel or to increase the arch to make the 16″ high vault?
Stay safe,
Phil Heacock in the Texas swamp
added by Rado:
Hi Phil,
Thank you for the note. It is even easier to construct the firebrick part with the 2 1/2″, yes 64mm, firebricks size.
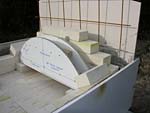
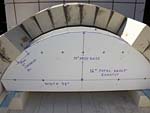
Here is the diagram on PDF file, for the dome construction, with the same US and European standard firebrick sizes; diagram for 2.5 inches – 64mm firebricks (this image can be zoomed in – magnified to a larger size.)
I will create a new whole page about using different firebrick sizes, will do it next week, when I get back home. Basically, it is positive to use thinner firebricks; they create smoother looking arches on the inside, because more bricks are in each arch, plus the ‘V – shape’ gaps between firebricks in arches get smaller.
By Phil Heacock
Hi Rado,
Thanks for the arch template, I will start adding up firebricks to see how many I will need.
Phil
By Phil Heacock
Rado, Wayne here again. Have started to do the dome, just want to know how long to leave wooden arch support underneath before bringing it forward to do next arch as I don’t want to take it away and have the whole thing collapse. Thanks again for all your help.
added by Rado:
Hi Wayne,
When any of the arches is fully completed, meaning the V gaps between firebricks are completely filled, wait 1-2 hours for the mortar to set and then you can gently drop down the wooden arch template to move it forward and to align it again for making the next arch. Obviously do not place anything heavy on top of the arches for the first 24 hours after finishing them.
You can make the whole firebrick part in one day (if you start as the first thing in the morning.) Because the sides walls are supported. Just touch the mortar to see if it’s hard. Welcome.
By Wayne
I have just bought some firebricks to make the arch and mark each brick. I have bought what they call 2 1/2 but when I got home and measured it, I found that it is 2 1/4. When you say 2 1/2 do you mean just that? Thank You Bart.
added by Rado :
Hi Bartolomeo,
The 2-1/4 inches thick firebricks are actually even better for making the arches, absolutely fine to use them. From this perspective …
In the actual fact, using these 2-1/4 inch thick firebricks is even better for arches as there can be 1-4 more bricks in each arch and, in fact, that makes the “V” shape gaps so much smaller (spaces between fire bricks on outer arch side), therefore less mortar is needed in between these bricks. Secondly, more bricks in the arch makes it a nicer smoother contour visually from the inside. That’s all, in this respect the performance of the ovens remains the same, in terms of cooking efficiency and firing, no matter which firebrick size is used. But it’s always better if the bricks are thinner. I have to use 3″ as they are standard here; good for the floor or walls but less appropriate for arches.
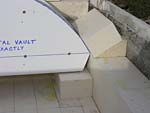
You can easily get the true exact 16″ – 407mm vault with any size of fire bricks (and of course also with splits 51mm – 2″ thin, beautiful actually) and keeping the desired arch width exact. This, with thinner firebricks, can be done by adding one or more bricks into the arch and then lower/flatten the center top down (if it goes a bit higher – this will expand both arch-sides-radius (not walls) out sideways a bit, the arch shape will be more like elliptical (in the original MTo design folder, look for the sub-folder with the low set oven, that one has a similarly shaped arches).
The side walls can be made out of 2 or 3 of these 2-1/4″ thick firebricks – I would make it still from 2.
8-3/4″ x 4-1/4″ x 2-3/8″ firebricks are commonly used too. The 12.5mm – 1/2″ will not make difference in internal chamber height but make the entry still 254mm – 10″ high.
Bartolomeo, did this helped you?
By Bartolomeo Parete
Rado yes thank you very much, I am making everything exact to what you specify but adding and bricks and thickness of mortar I needed answers for. I am happy with all the measurement since it’s identical in size to yours, thanks to your instructions. I am taking picture as I go along that and I will send them to you when all is complete, if this winter goes away. Thanks again and enjoy you sunshine. Ciaoooo
By Bartolomeo Parete
Thank you for your detailed information if I like to continue building on the arch a wall how much weight can it support?
By Sotiriou Dimitrios
Hi saw your site looks awsome just wondered where you got your thermometer from as I just built mine and would need one. Thanks
By Damien
Hi Damien,
See comments towards the end of this page: Brick oven with thermometer gauge.
And also these two articles with info on: digital thermometer and stainless steel oven thermometer.
By Rado
Rado,
A couple of questions while I’m waiting for the disk.
For a barrel oven, your design uses 4 firebrick arches with a back wall built behind the arch.
1) why do you not lay them in an interlock, surely that would be stronger (not withstanding the fact you need a full length former)?
2) I’ve seen it said that the back wall should be built under the arch (not behind) so the dome can expand over it. Have you seen any issues with this? I’m guessing not or you wouldn’t still do it?
Thanks
By David
Hi David,
Thanks for the notes. This is refractory work, the part that uses firebricks, which is much different to the common masonry approach. But of course everything can always be smartly suited to something else if it needs to be. There is always a f’ing way. For these jobs take into account one thing, every-time the oven gets to hot state it undergoes expanding of the heat absorbing mass. And later with the cooling down it gradually moves back to the original size. So we deal with such expand contracts motion. Hypothetically (to put it into a perspective); if you got these or even similar movements within a masonry work of a house etc., that structure could be in a trouble soon if exposed to stretch impacts. But the designing to cope with various moves, like masonry subjected to outside fluctuating temperatures, seasonally and so on, is always possible.
Interlocking firebricks would not work at all without many of the firebricks cracking into halves at the mid joint places. This would be caused by expanding while the firebricks push onto each other (and by gravity of course) plus further at cooling/shrinking down on the temp way back. Firebricks easily adjust themselves to one another. To reside nicely flat-accurately on top of the other. Even if they had to be halved by themselves in many places. Yes, but I suppose the back wall could be placed also under the vault/arch easily, instead of the wall behind the arches as it is. You mentioned; “I’ve seen it said …”, where have you seen it?
That would only require another extra designing/workmanship aspects to it:
1. half firebrick length space of the vault would be absorbed above the wall (equals smaller oven inside by at least 4-1/2″ – 115mm in the chamber’s depth. Or add one more arch to even it up.)
2. more firebrick cutting though in the top part of the back wall as to copy the inner arch line and fiddling with firebricks.
3. in the performance sense such an (adjusted) oven would not cook or bake etc. any different.
Heaps of structural subjects are addressed in this Dome versus Barrel design page. Enjoy!
Cheers Mate,
Rado
By Rado
Hi Rado, here’s a newbie question for you.
Where do I get / how do I make the triangular firebrick pieces that start and end each arch?
By Jonathan
Jonathan,
To make the skew firebricks for each side it’s very easy and quick:
1. First place the wooden arch template in place and set it into position – image #0985
2. Then temporarily place one firebrick in the first spot and hold it there, it will perfectly show you the accurate angle of the wall brick and the arch brick.
3. Take a piece of some cardboard and mark with lines the accurate angle. Cut it out with scissors and you have an impression template.
4. With it mark the lines onto a firebrick with sharp pencil (a pen works too.)
Like on images #1181, #1182 and #1183 (showing on the next page for oven firebrick entrance details.)
* I cut these using a quality diamond masonry cutting wheel on a small hand-held angle grinder, one cut per side. Keep the off cut triangular pieces for finishing the oven entrance.
By radko
Rado
Thanks for all of the information. I have started my arches today When I start on the cladding can I just add lime to to the premix concrete to get the same result?
By Bill
The skew bricks are critical to a good arch. Rado has the experience to cut good blocks with a 4.5″ cutoff wheel. I found out that I don’t. :(
I finally broke down and got a diamond blade for my 12″ harbor freight compound miter saw. Lay a piece of plywood over the table, sort out your entry angle and you are good. If they are all consistent, you arches will be consistent. If the skew blocks are all over, your arches will be as well.
This applies to all the arches. Take your time, make them right. I cannot over emphasize the importance of this one.
By Vince Nylin