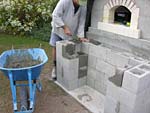
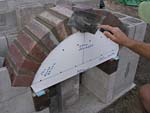
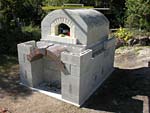
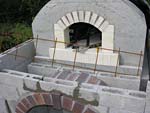
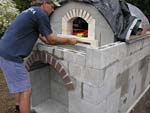
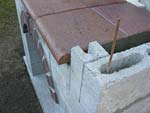
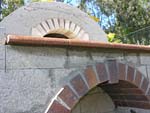
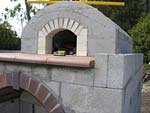
Decorative brick arch and flat entry surface
Creating decorative brick arch in the front with a nicely spacious pot resting surface above it.
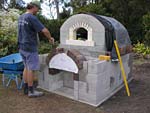
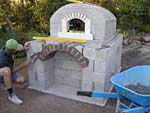
Masterly Tail oven design (3G MTo) – 3G MTo Main Page
Pointers:
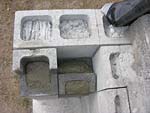
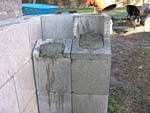
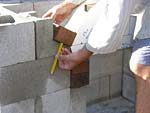
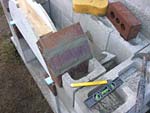
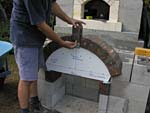
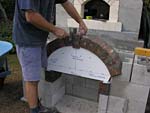
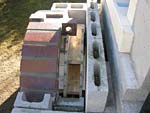
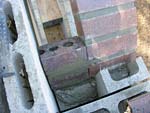
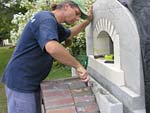
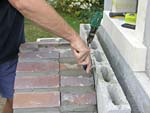
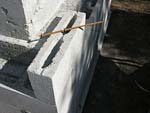
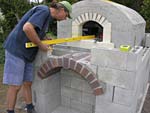
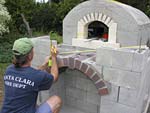
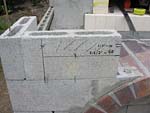
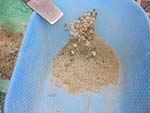
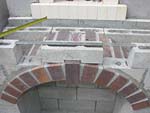
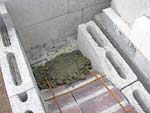
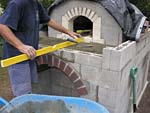
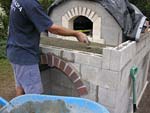
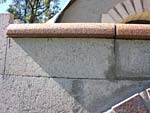
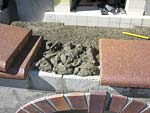
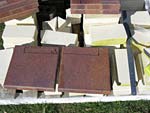
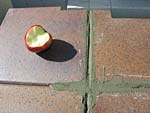
1. I always use darker red or brown house clay bricks for making my deco arches. Or clay pavers for making this flat pot resting surface in front of the oven. This surface has several uses as everyone can easily imagine what these could be. Both products I mostly work with come from Claypave Pty. Ltd. It is my local and my preferred manufacturer I buy material from (I also buy often from private individuals), the company also ships/delivers orders which is handy. With any light-ish background or surround those dark brick arches out-stand and give the oven that appropriate character.
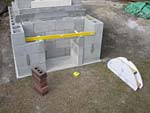
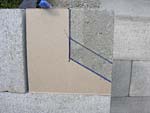
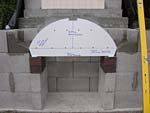
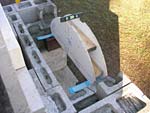
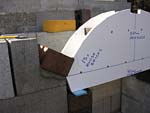
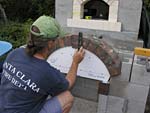
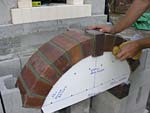
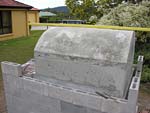
2. I create a new page specifically for making precise wooden templates. Templates for making any kind or size or shape of brick arches.
Pot resting surface & decorative brick arch
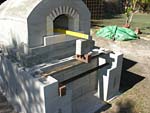


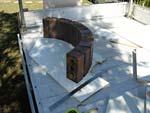
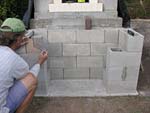
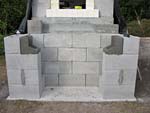
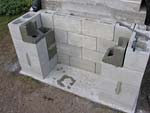
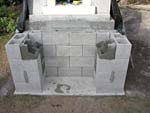
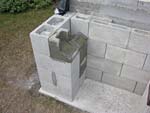
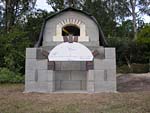

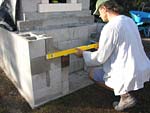
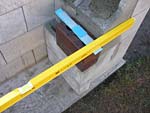
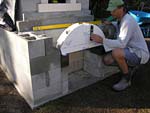
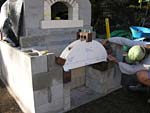


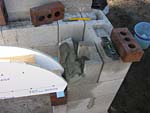
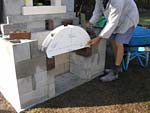
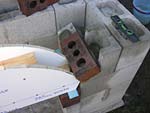
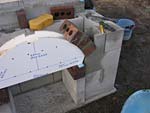
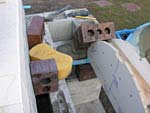

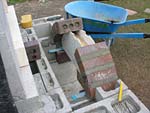
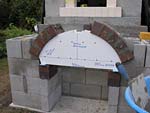
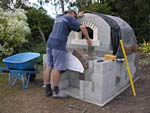
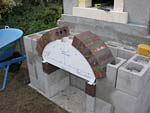
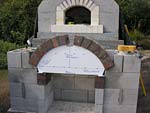
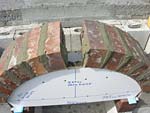
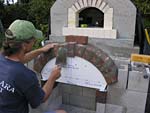
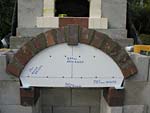
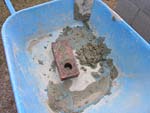

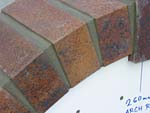


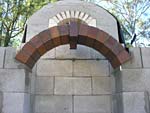
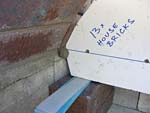
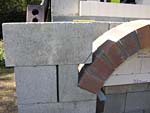
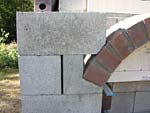
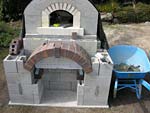

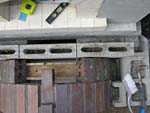

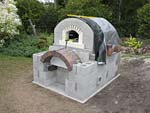
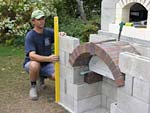
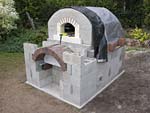
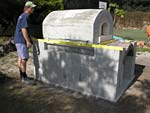
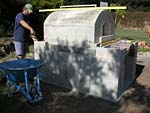
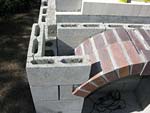
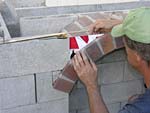
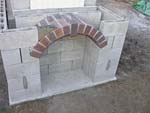
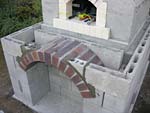
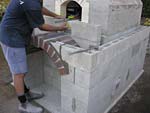
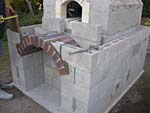
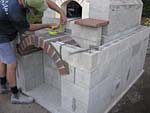

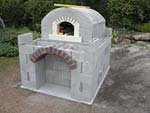


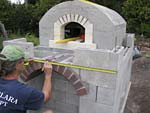
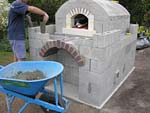

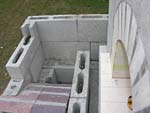
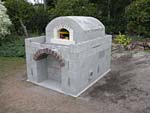
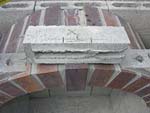
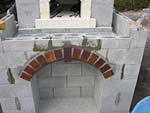

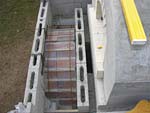
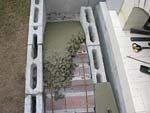
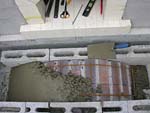
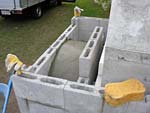
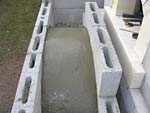
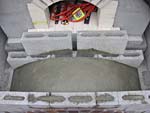
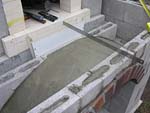
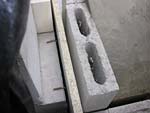
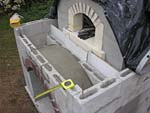
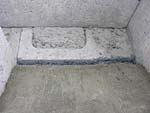


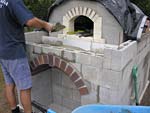

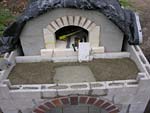
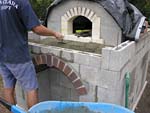
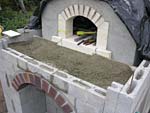
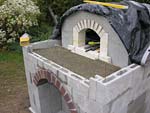

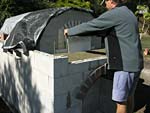

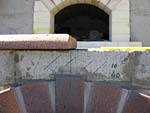
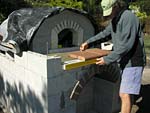
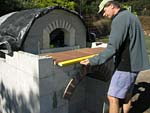
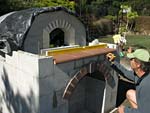
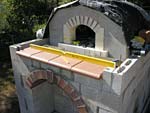
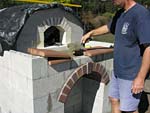

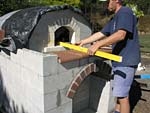
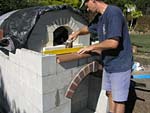
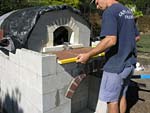
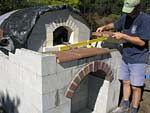
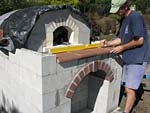
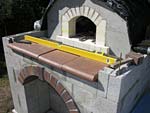
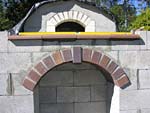
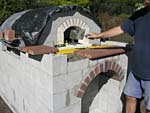
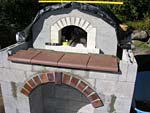
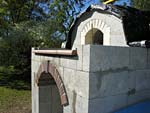
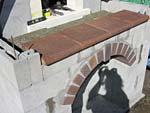
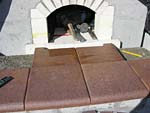
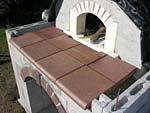
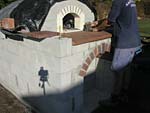
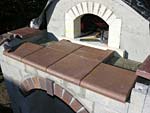
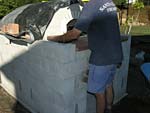

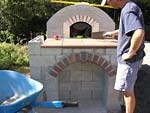
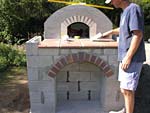
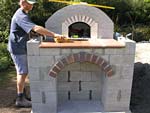
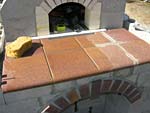
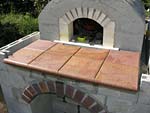
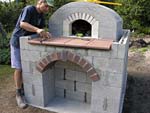
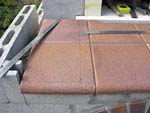
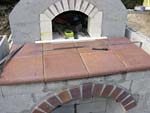
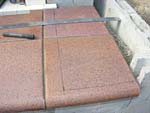
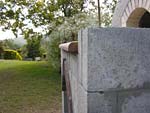
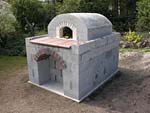
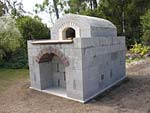
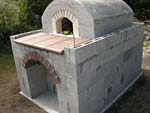
Making “brick arch” decoration with a “pot resting surface” above it for a pot or a tray resting. Step by step progress on this page contains 216/431 photos.
Total images 1431 – 1861 (out of 2,785 from the whole oven building photographic sequence.)
3G MTo main page.
There are also the Swishy oven and Original MTo designs to consider, full versions for download or on CD’s. Brick work decorations from either of the two ovens can be easily adopted.
Respond to the Decorative brick arch and flat entry surface article:
8 Comments
Sorry, the comment form is closed at this time.
Rado, Do you have the precise template information for the above house brick deco arches mentioned in Pointer 2. Thanks Dean
added by Rado:
Hi Mate!
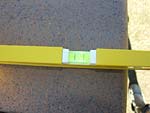
How long is the string for making wooden arch templates?
Er, how long is the string(?) … this is how I do it to get the string just right-long between the 3 points (2x arch sides and 1x arch height points):
1. On an old board make a long straight base line, roughly 2″ – 5cm from one edge of the board (I re-use boards from demolished kitchen cupboards, it is easy to draw on the material).
2. On this base line mark the desired ‘arch width’ by making two side points.
3. Set the exact center on the base line between these to points.
4. From this center point draw 90 degrees line upwards (approx. of the arch rise length and longer.)
5. Mark the desired arch height point on this 90 degree line starting from the base line.
6. Take a string with pencil on one end and point the pencil on the 90 deg. line at the arch rise/top mark.
7. With thumbnail hold the string straight directly below and along the 90 deg. line.
8. This is a very fast matter to set the exact string length. Hold the pencil vertically straight and move it towards to one side making only a test/provisional radius until the base line is reached.
9. A: if you end up too far from the arch side point (on inside), just hold the string a bit lower so the string is a little longer and do it ones more.
B: on other hand, if you would have drawn the arch line too wide, further behind the arch side points, then shorten the string a bit by holding it slightly higher.
C: this takes 1 minute to tune the arch radius precisely.
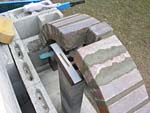
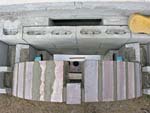
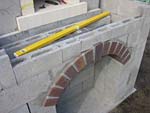
10. Draw the arch line from one arch side to the other trough the top arch side point. Or start from the center; draw the line to right first, then the second half from the center to left. Now you can start to place bricks along the arch line. In decorative arches created out of house bricks I leave a ~ 1/8 inch – ~3mm gaps between all bricks so these do not go together tightly, it looks better on the wall that way.
* You can always decide to add extra brick(s) into the arch making it elliptical and keeping the existing arch rise height just the same; do it simply by starting to push arch bricks on each side outwards from the drawn line, while keeping first brick on both sides at the total arch width mark and also keeping the center bricks at the total arch rise point. This way accurate arches can be designed. Cut the template out slowly pushing the jigsaw blade along – just licking the line and on the outside of the line, it is easy really (the jigsaw blade is about 1mm thick, so this is if you wanted to have the template absolutely precise – e.g. for the brick oven firebrick arches ;o)
** There are many more images in the full 3g MTo photo sequence you downloaded to accompany the whole arch making process. Please look at them around the image #1440 (similarly in the Swishy oven design sequence and in the Original MTo design too, they may show a different angles also.) I will make the page but this is basically it. It takes me ~ 60 minutes to create any wooden arch making template.
By Dean Foote
Hi Rado,
I bought a set of your plans 2 years ago and I have been collecting materials ever since. I hope to break ground this spring. I do like some of the ideas in the 3gMTO. Can I receive the plans also for this new oven design?
Thanks,
Willie
By Bill Brehm
Hi Rado,
I sorta thought it might have been as simple as that.
Thanks!
By Paul
Bill & Paul,
Enjoy your new ovens!
By Rado
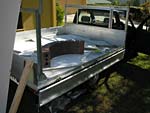
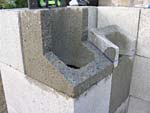
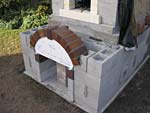
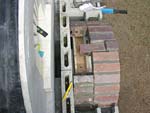
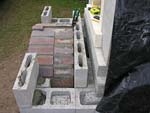
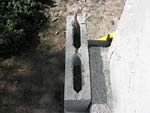
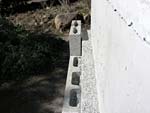
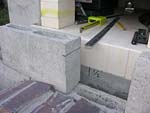
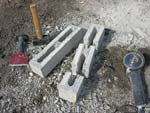
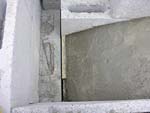
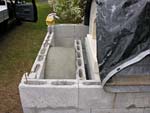
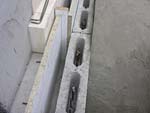
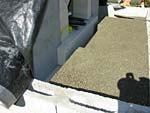
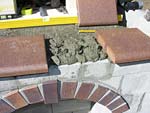
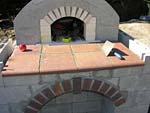
G’day Mate, in regards to this flat pot resting surface – section-part between pictures image #1766 and down to image #1861 (great details by the way for the plans), what do you refer to this material as, pavers / tiles? Are they clay or concrete?
I’m looking for a supplier but it is a bit difficult without the proper name.
Thanks for your time,
Brett
By Brett
Hi Brett,
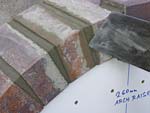
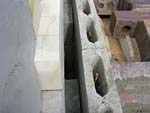
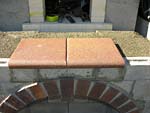
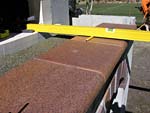
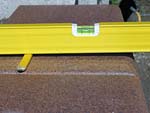
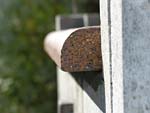
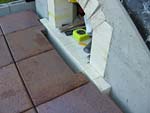
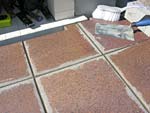
Thanks for the note about the squares. They are clay pavers. I prefer this sort of red color clay pavers (or also house bricks for the arches, both look nice and natural as they are produced from a natural clay.)
These pavers in the front, the first facing line, have one round (bull-nose) edge / side, the rounded convex trim is practical here because it’s smooth on elbows.
The darker they are the better. With the whitish walls on the oven the reds stand out as in a better contrast. Well that’s just my opinion about aesthetics and wood fired pizza / bread ovens.
By Rado
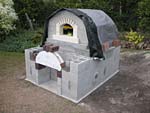
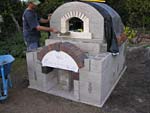
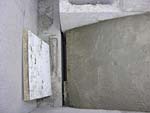
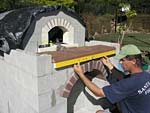
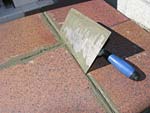
Hi Rado… I bought your MTo plans awhile ago… Unfortunately I had started with another plan and modified the base to fit your oven… It’s a hybrid design but I’m happy so far. I am having trouble finding the tile for the front arch entrance… This tile looks to be 1 inch in thickness and about 12 inches square… I cannot find a distributor with this tile… the best I can find is 1/2 inch thick glazed clay outdoor tile for steps… If I use 1/2 thick tile I worry that the weight of the chimney may be too much for this tile. You use a vermiculite/concrete base for this tile.. I live in Victoria British Columbia… you may have contact with other people who have passed on their sources..
Any suggestion is welcome…
I tell everyone about your ovens and your web site… You are the Master…
By Jim
Hello Jim,
I appreciate your nice words about our work. Everybody contributes into it. Often I get these bull-nose tiles/pavers in half size 12″ x 6″ instead the 12″ squares. The 1/2 inch thick tiles you can buy would look nice too. What you could do; simply fit the tiles between the chimney walls after the hood walls are in place, where the chimney will sit on the base not on the tiles. And for the effect in the front, on both sides, cut off 2 small pieces from the tile and fit/set them in into the facing wall (beside the front deco arch walls – in both sides) so the line of the pot resting surface extends as is, wider than the whole hood vent box. You can fit these two pieces within/inside of the oven facing wall. And that’s it, solved! The final outcome will be the same and it will look and function the same also. Do you see what I suggest?
By Rado