Concrete garden bench – how to make
Here is a step-by-step sheet for the concrete bench:
(With pictures. Paul’s wood fired oven, under cover, gallery page.)
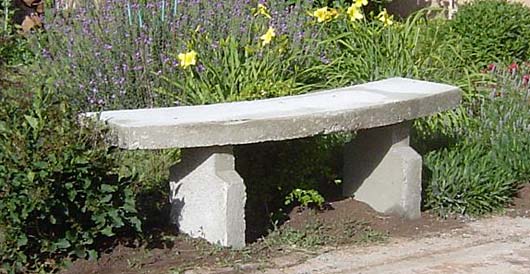
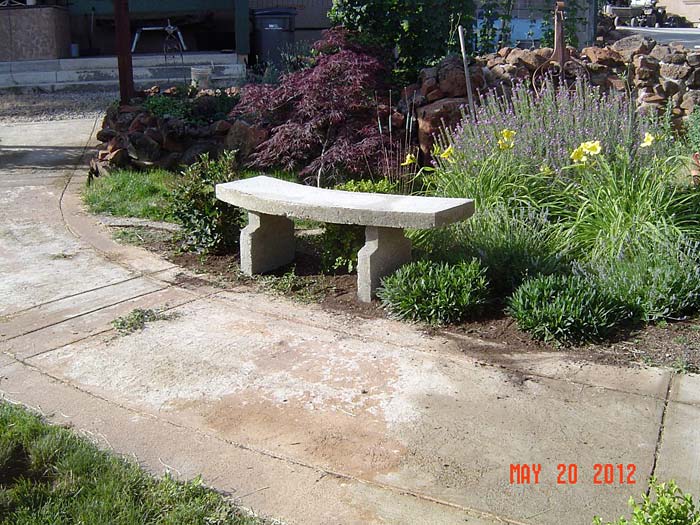
Purchasing a concrete garden bench can be expensive. An alternative is making your own. It can be done for very little money and can be done by anyone who can rip wood strips and cut a few angles and the rewards of doing something for yourself or with family and friends is priceless.
The bench I made is 5 feet X 17 inches X 3 ½ inches thick. I created a bend in the design as I thought it would look better in the garden with the plants. The total height is approximately 18 inches.
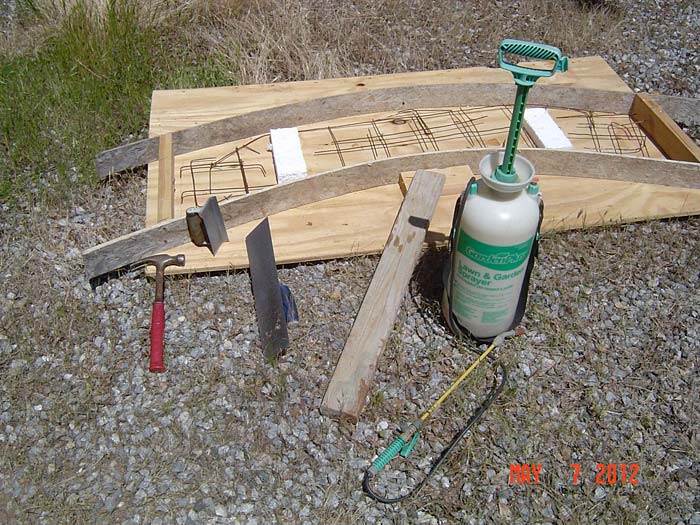
I started by finding some items necessary to form the bench around construction sites for free!
Parts list:
- 5/8 inch plywood 5 feet X 3 feet X 5/8”inches
- 3/8 plywood or siding X 10 X 8 inches
- Pressed wood siding 8 feet X 7 inches X 5/8 inches
- 5 – 2 X 4 X 8 Doug fir stud
- Shipping/packing foam 10 X 1 ½ X
- 1 sheet 5-inch square wire
- Rebar wire
- Pound – 2 ½ wood screws and 5/8 wood screws
- 6 – 1 inch finish nails
- Spray bottle
- Diesel
- Sugar
- Edge trowel
- Flat trowel
- Hammer
- Drill/screw-gun
- Bag of mortar
- Glue
I had con mix and Portland cement but for convenience you could purchase four bags of pre mixed cement.
Note: For those folks not familiar with wood framing sizes the term 2 X 4 is used but the wood mills cut the wood 1 ½ X 3 ½ inches.
The bench
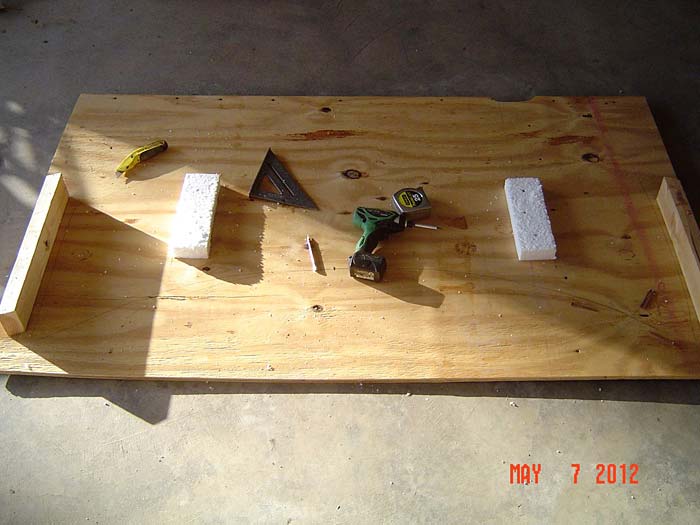
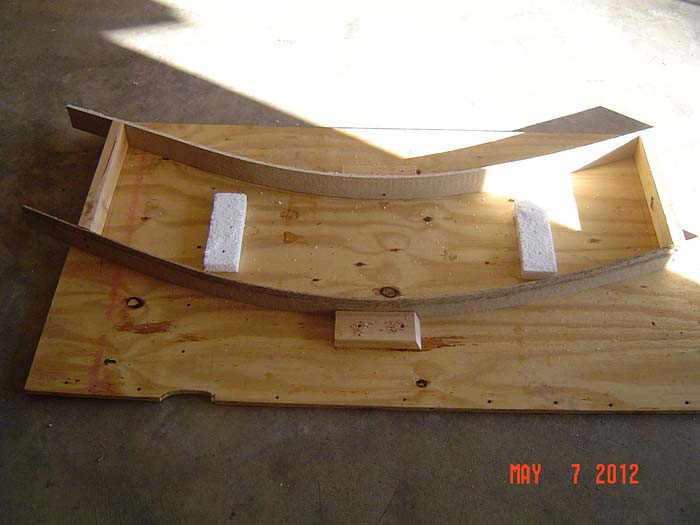
1) Lay the 5 foot X 3 foot X 5/8-inch plywood flat on the floor.
2) Measure two pieces of 2 X 4 Doug fir 17 inches, cut them with a 20-degree angles on both ends.
3) Measure and pencil mark a center across the plywood.
4) Measure and pencil mark the center of the 2 X 4 X 17 Doug.
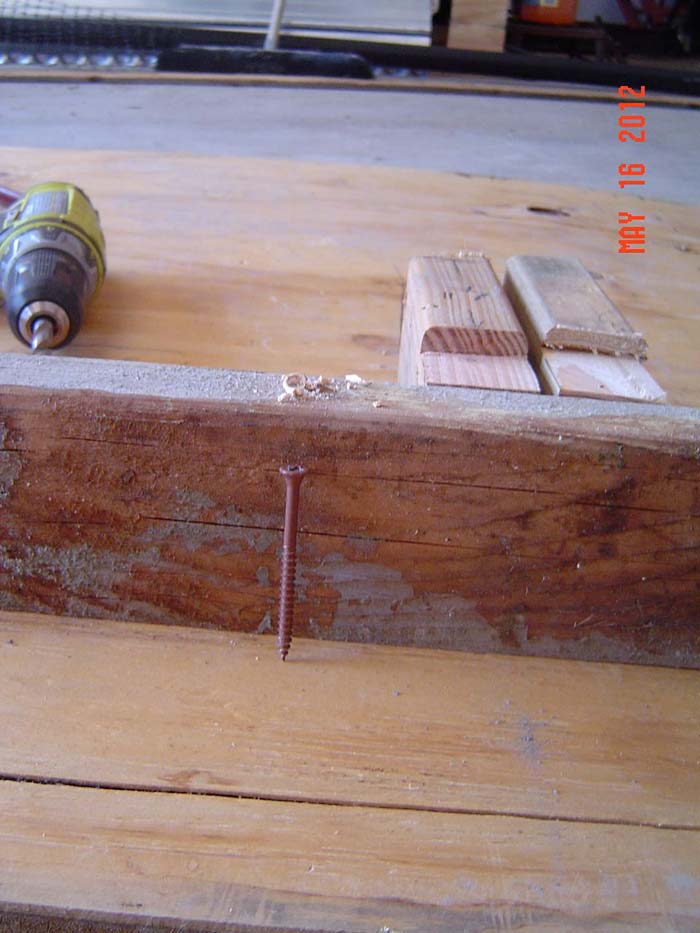
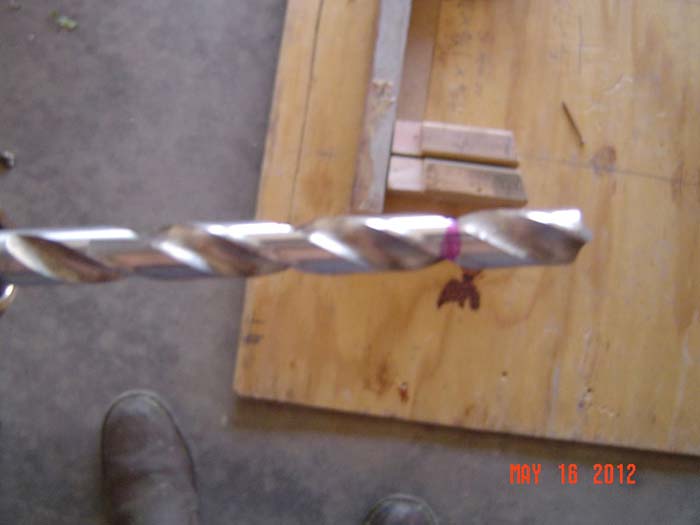
5) Pre drilled 2 – 3/8 holes 1-¼ inches deep 7 inches apart through the 3-½ sides.
6) Secure these pieces to the plywood 1 ½ from the edge of the plywood and matching up the pencil marks, use 2-½ inch screws to secure (3 ½ inches high).
7) Cut two short pieces of 2 X 4 Doug fir 6 inches long.
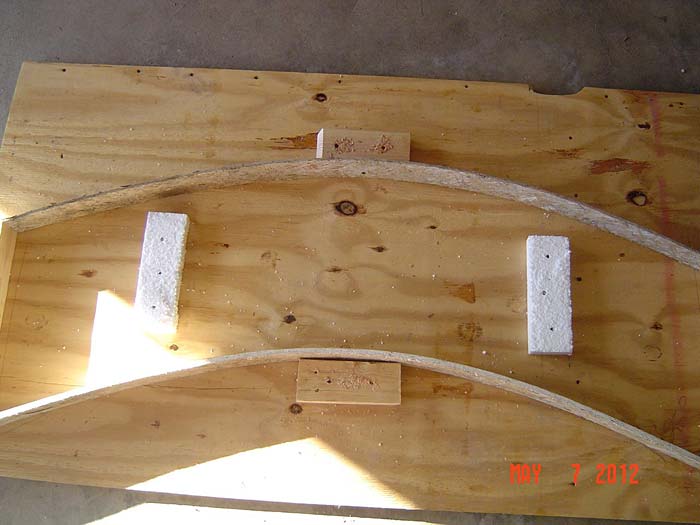
8) Cut 5/8 wood-siding 3-1/2 inches wide X 7 feet.
9) Push the 5/8 X 3-1/2 X 7 foot strip you cut into the two 17 inch pieces of Doug fir attached to the ply wood and secure with two 2-1/2 inch each end.
10) Place the 6 inch short piece of Doug fir behind the center of the bend in the siding strip to support outside the form.
11) Secure this with 2-½ -inch screws.
12) Cut and install the second wood-siding strip on the opposite side. Measure the center of the bend making sure you keep the 17 inches consistent. Secure with a 6-inch Doug fir and screws.
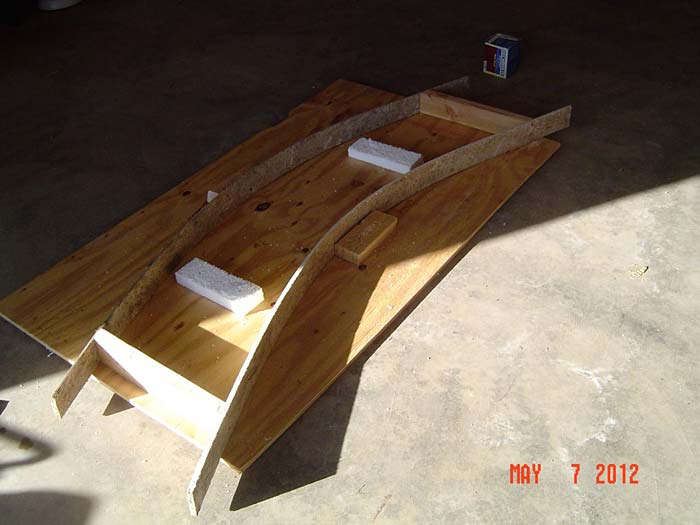
13) Measure 11 inches from the inside of each 17-inch Doug fir and mark a line on the plywood.
14) Cut the packing foam 9 ½ X 1 X 2 7/8 inches.
15) Place the packing foam on that line and secure with glue.
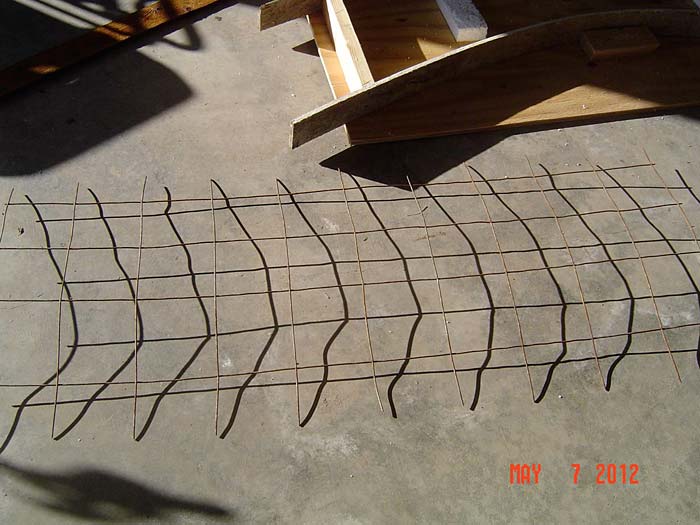
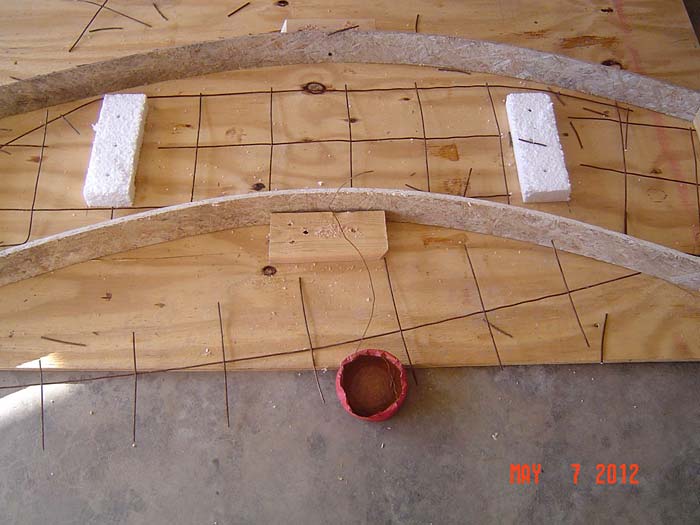
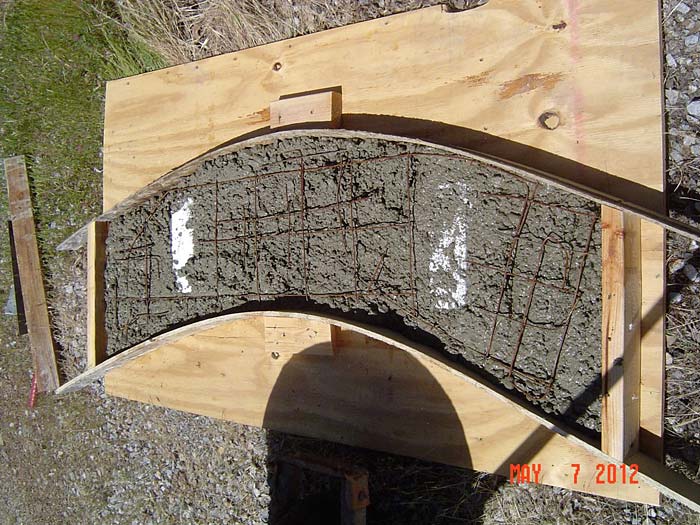
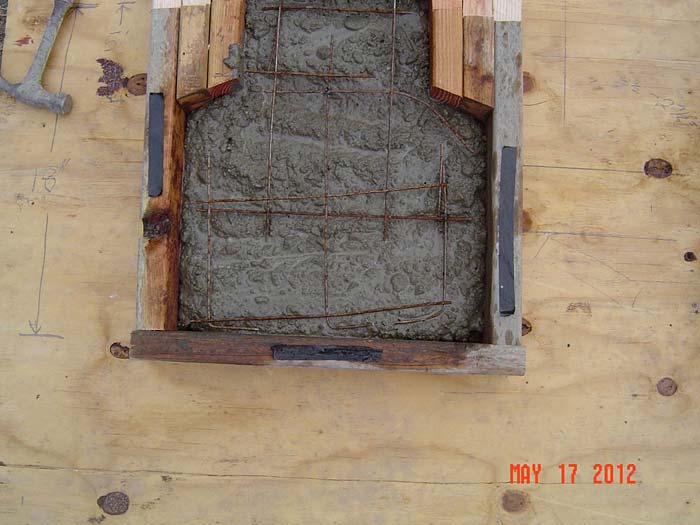
16) Lay the 5-inch square wire over the bench form and cut the wire to allow it to fit inside the form.
17) Cut the wire to allow it to miss the packing form.
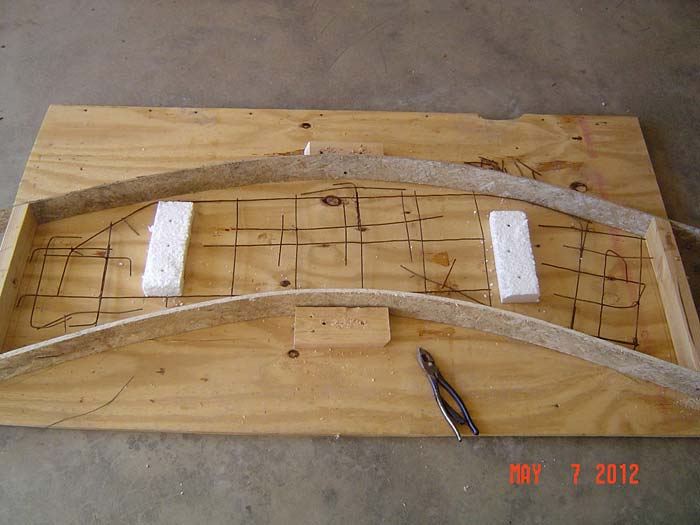
18) Use rebar wire to attach cut-out pieces of the 5-inch square wire to add extra reinforcement.
19) Remove rebar wire from the form and place aside.
20) Place tape over all pre-drilled screw holes.
21) Spay diesel on the plywood and all inside wood pieces of the form. This will prevent the concrete sticking to the wood allowing you to pop of the wood when the concrete has set.
Have the two trowels, a 20-inch piece of Doug fir, a hammer and a cup of sugar with a cup of water in a spray bottle ready.
Mixing and pouring the concrete
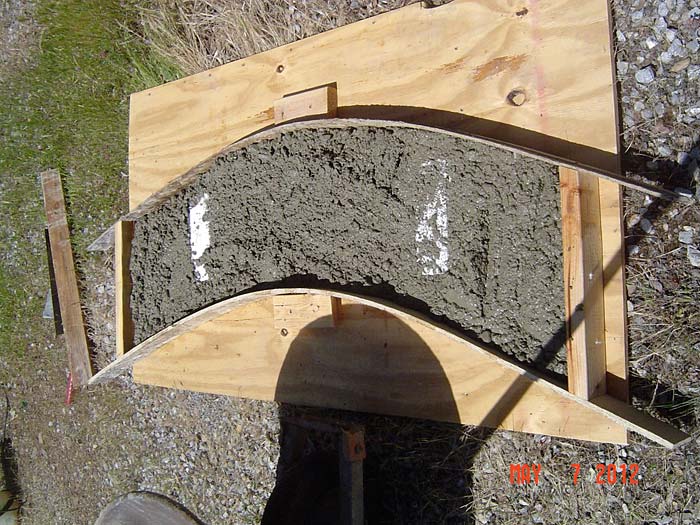
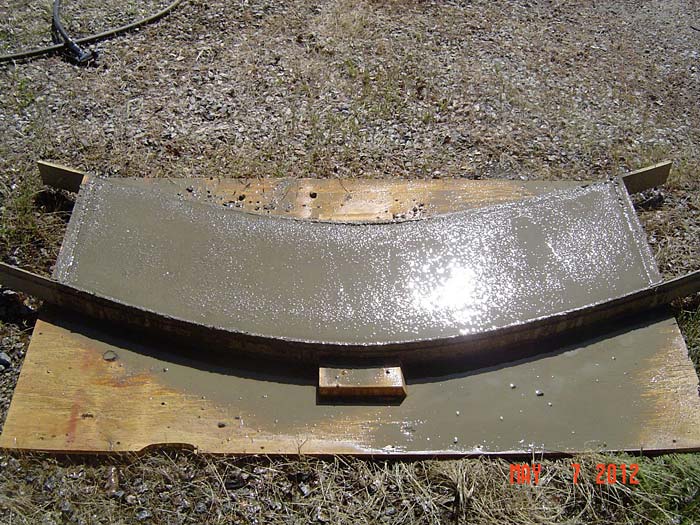
- 1) Mix the concrete with water a to a semi wet consistence, shovel in the bottom half.
- 2) Lay in the 5-inch square wire.
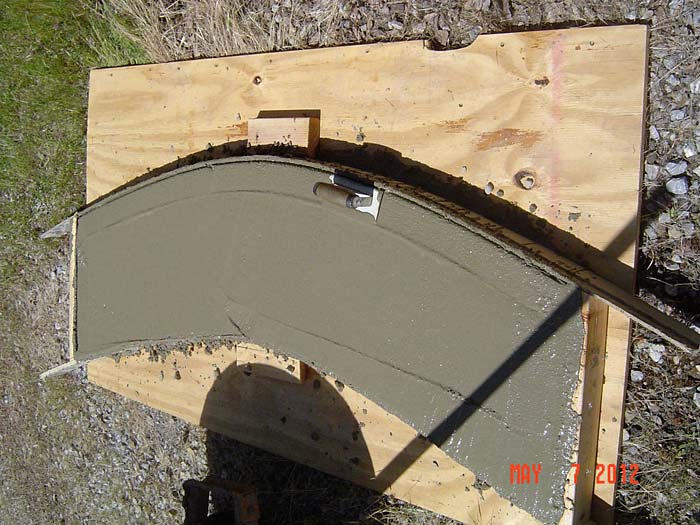
- 3) Fill the form until it has enough concrete.
- 4) Hammer; tap around the edge of the form (lots of small tapping).
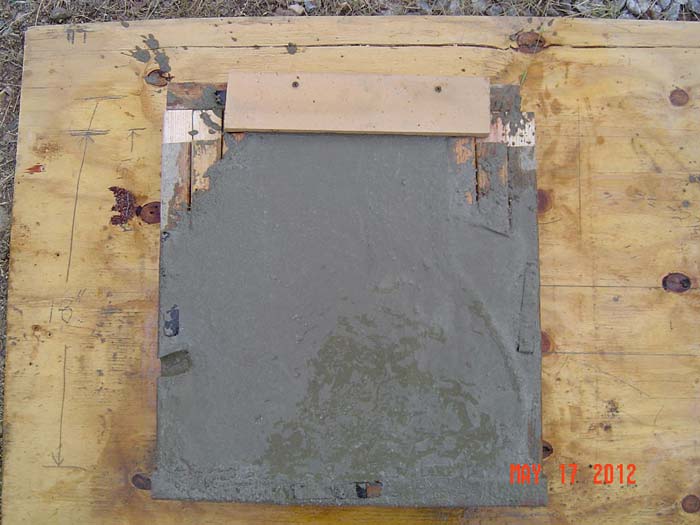
- 5) Use the 20-inch 2 X 4 Doug fir and a small towel, lay the 2 X 4 on top of the form at one end and start sawing back an forth slowly moving across the top of the form from one end to the other. If extra concrete heaps up use the small trowel to move it along. As you get to the end saw off the excess concrete.
- 6) Take the edging trowel and run it around the edge, then use the hammer to tap the sides again.
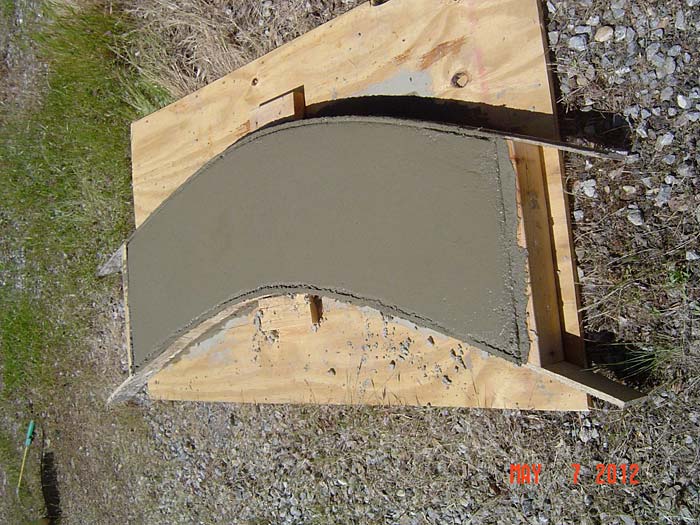
- 7) Use the flat trowel to work the top flat while making sure all the stone is pushed down. This will bring up water to the top and as you finish you should lighten your pressure on the concrete leaving a smooth finish.
- 8) Scrape excess concrete around the form away while still wet.
- 9) Allow the concrete to cure for 30 minutes, depending on ambient temperature.
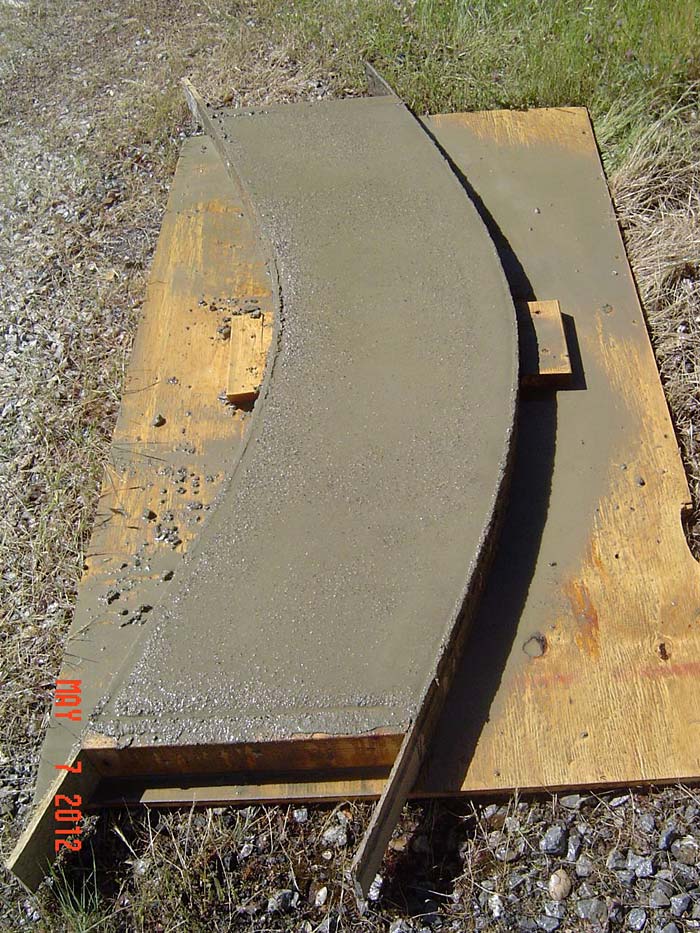
- 10) Spay sugar water lightly over the concrete wait five minuets.
- 11) Use a garden hose set with a wide spray, wash of the top to the degree of exposed stone you would like.
It takes concrete 27 days to set to 90 percent but you will be able to strip the form off after four days.
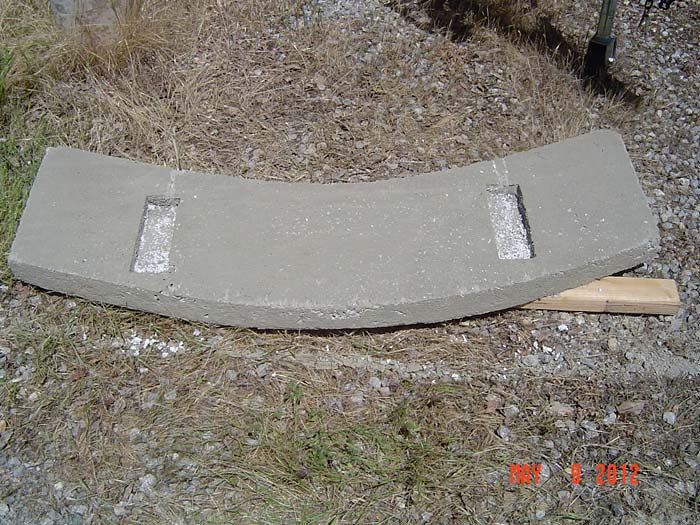
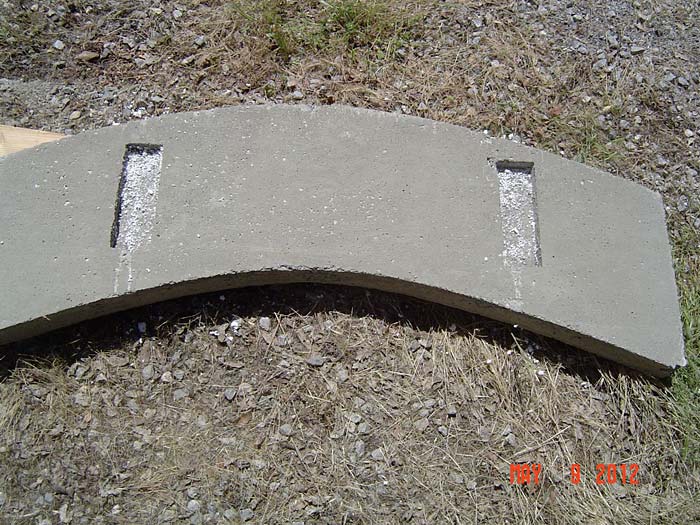
Strip off the wood form. Get some help, as the bench top will be heavy, gently flip over the concrete bench, dig out the packing material this will be where the two legs fit into the bench.
Bench legs.
I reused the 5 feet X 3 feet X 5/8 plywood.
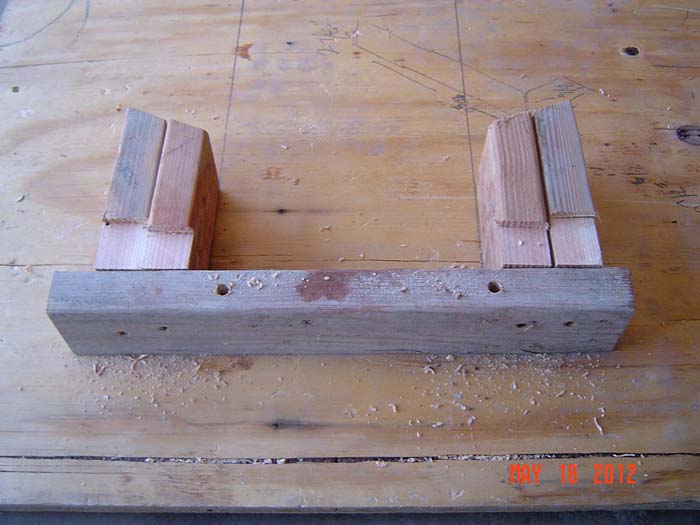
- 1) Cut two 2 X 4 X 19 inches long.
- 2) Pre-drill the 2 X 4 with 3/8 drill and secure them to the plywood with 2 ½ in screws.
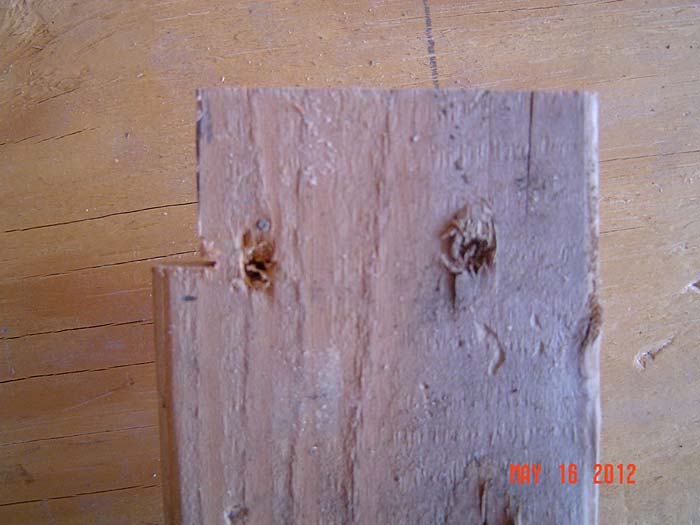
- 3) Place and center the 9 3/8 X 3/4 X 3/8 plywood against the 2 X 4 just secured to the large plywood, nail this part in place.
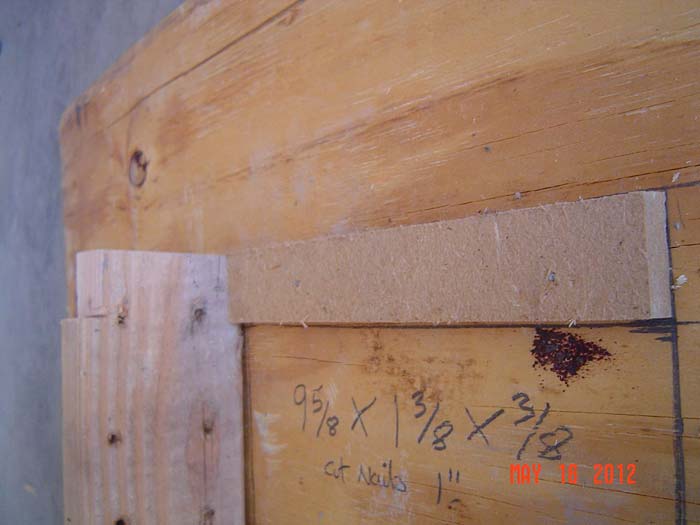
- 4) Reuse the side bench 2 X 4 with the 20-degree cuts, measure from the longest edge 5 inches and cut a straight cut.
- 5) Cut 3/8 X 1 3/8 off the top.
- 6) Secure this piece against the 3/8-plywood and the 2 X 4 X 19.
- 7) Measure the leftover piece of the side bench to allow the 20-degree angle to double up keeping the angle running the width of the two 2 X 4 pieces.
- 8) Cut 3/8 X 1 3/8 off the top.
- 9) Secure with 2 ½ inch screws.
- 10) Utilize the other side bench piece to repeat the same cuts on the other side.
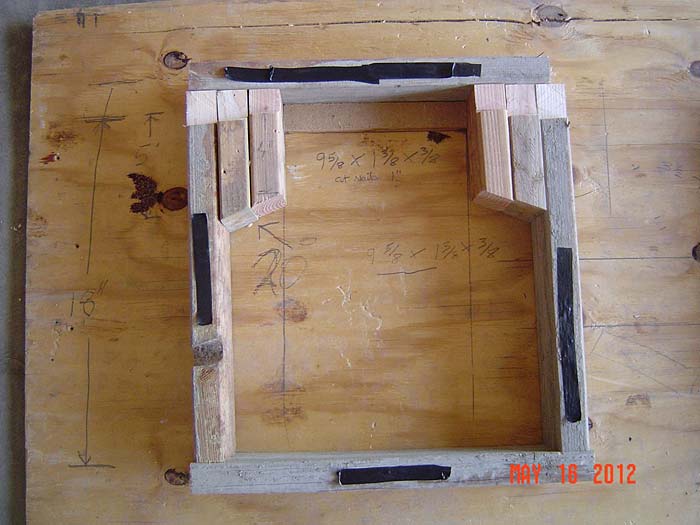
- 11) Depending on the height of your bench desire cut two 2 X 4 to the length you need and secure them to the outside of the four small pieces with the 20-degree cuts.
- 12) Cut 3/8 X 1 3/8 off the top.
- 13) Butt this piece against the top 2 X 4 X 19 inch wood and along the outside of the two short 2 X 4 with the 20-degree angle cuts.
- 14) Make sure the width at the bottom is 15 3/8 inches and secure with 2 ½ inch screws.
- 15) Cut 2 X 4 X 19 inches and butt it against the last two pieces, secure with 2 ½ inch screws.
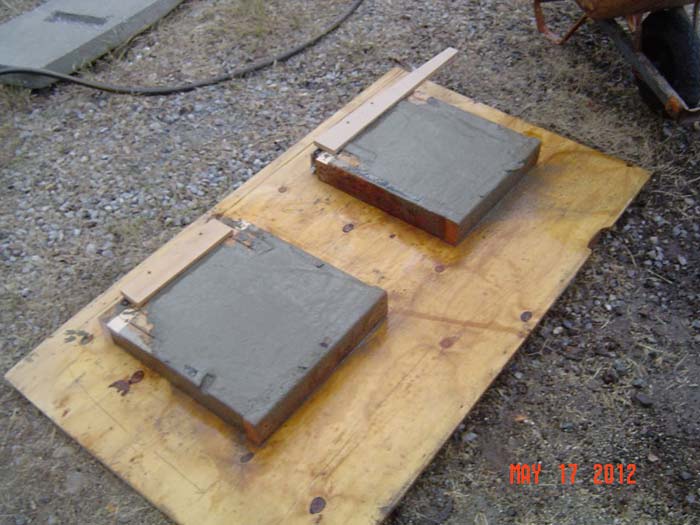
- * This is the form for one leg. You can reuse this form if you want to mix two separate pours or make another form and pour two legs at the same time.
- 16) Cut rebar wire to fit inside the form.
- 17) Remove rebar wire from the form and place aside.
- 18) Cut two wood strips 12 X 2 X 3/8 (install as you pour the form).
- 19) Tape over all pre drilled screw holes.
- 20) Remove rebar Spay diesel on the plywood and all inside wood pieces of the form.

Have the two trowels, a 20-inch piece of Doug fir, a hammer and a cup of sugar with a cup of water in a spray bottle ready.


- 1) Mix and half fill the form with concrete.
- 2) Tap all edges.
- 3) Lay in rebar.
- 4) Fill the form with concrete.
- 5) Tap outside of form edges, saw with scrap 2 X 4.
- 6) Tap edges.
- 7) Spray diesel on one side of the 12 X 2 X 3/8 strip you cut earlier, secure them over the top part of the form where the 3/8 wood cut where made (this will be the part of the leg that fits into the underside of the bench).
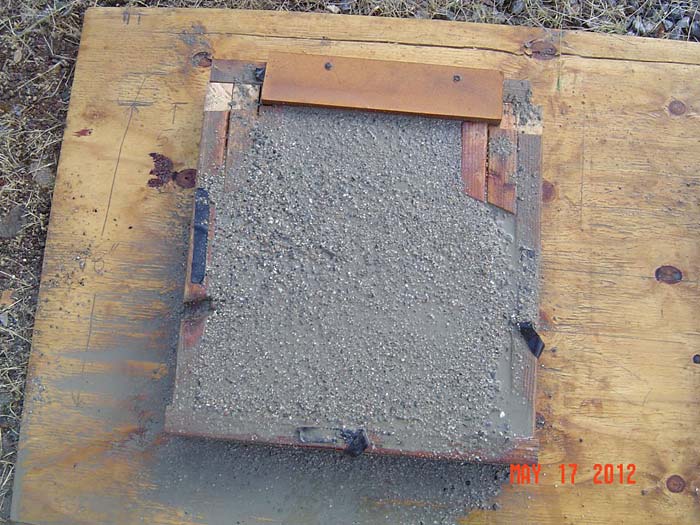
- 8) Float of the concrete form.
- 9) Allow the concrete to cure for 30 minutes, depending on ambient temperature.
- 10) Spay sugar water lightly over the concrete wait five minuets, then use a garden hose set with a wide spray, wash of the top to the degree of exposed stone you would like.
When the concrete has cured remove all wood. Move the three bench parts to the location where you want your bench. Lay the bench part top down.
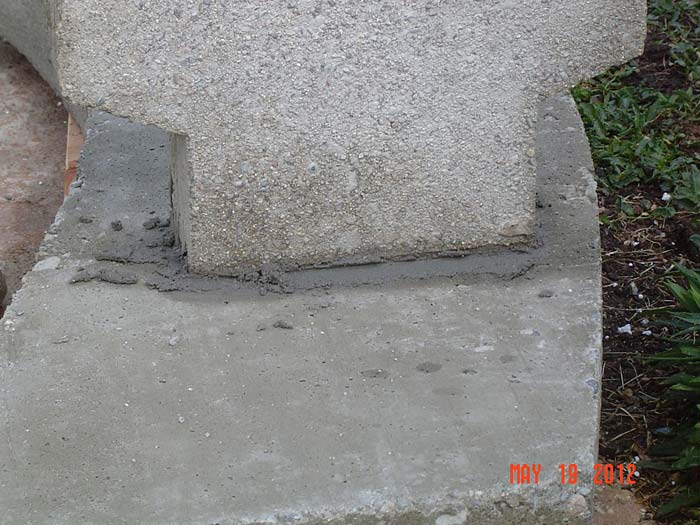
- 1) Mix a small amount of mortar, place some mortar in the slot in the bottom of the bench, butter some mortar on the top of a concrete leg.
- 2) Lift and gently place the leg into the bench, pressing down to allow the leg and bench to flush.
- 3) Scrape of excess mortar then wet sponge around the contact point.
- 4) Repeat for the second leg.
- 5) Allow a day to dry then with help set your bench in place.

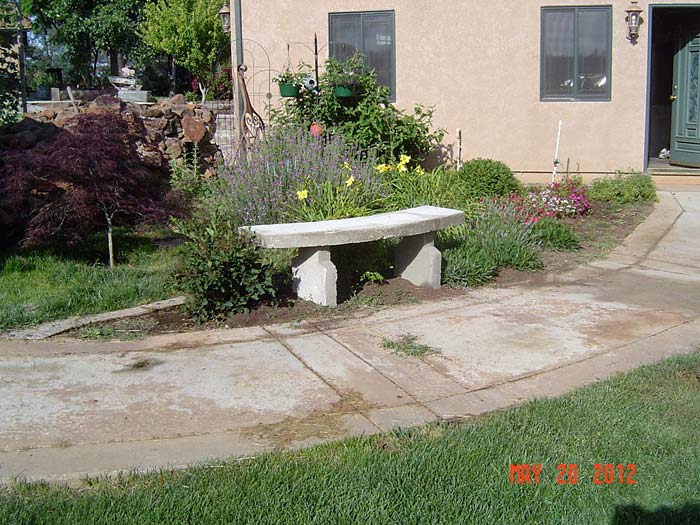
There are many creative ascents you can add to this bench, glued or nailed shapes can make in-prints or placing multiple shapes will create a raised design. Colors can be mixed in the pour. Crushed-granite can be used instead of stone in the concrete mix, and then disked down with a diamond blade, which leaves a wonderful colorful finish. You can also stamp patterns in the wet concrete or write messages! I hope this Blog helps you create you bench.
Article by Paul,
in Shingletown, California, USA
Respond to the Concrete garden bench – how to make article:
2 Comments
Sorry, the comment form is closed at this time.
I just built one for my sister and brother in law in Oregon didn’t look at your plans till done and it is exactly how my plans pretty much are. Good idea hats off to whom ever made up these plans. My first time and it’s awesome. Thank you. David Comstock
From Chino Ca. With KEIZER CONSTRUCTION Joshua Tree Ca.
By David
Just be sure to ask before removing any building materials from a job Site. Even what might look like a waste items. Materials are very expensive today and about every piece is used. Might save you a trip to the Slammer. ;-) But for sure, free materials can be gathered quite easily, all one has to do is to ask and express thanks. Nice job.
By Woody