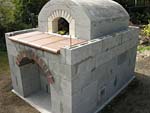
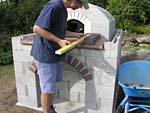
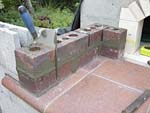
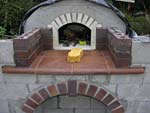
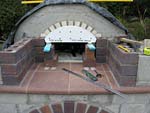
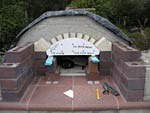
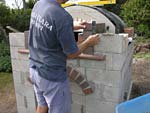
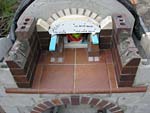
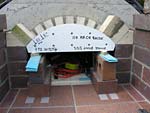
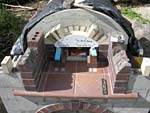
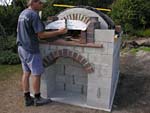
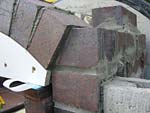
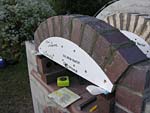
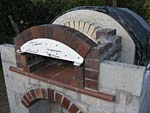
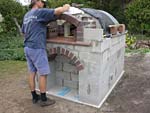
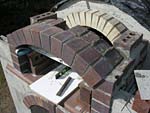
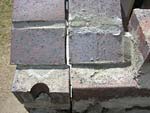
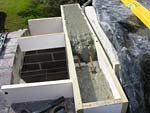
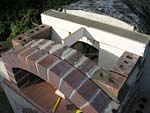
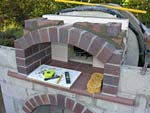
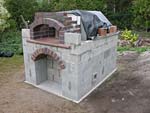
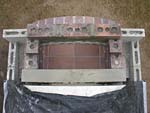
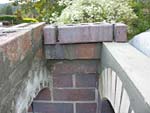
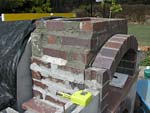
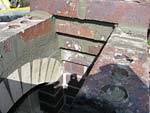
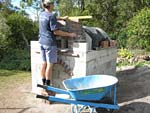
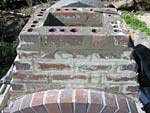
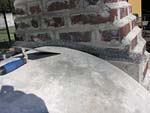
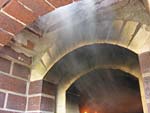
Entrance arch & flue hood with hot-air passage
Making arched brick entrance with flue hood box and hot-air passage. Masterly Tail oven design (3G MTo) – 3G MTo First Page
Pointers:
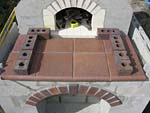
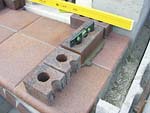
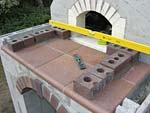
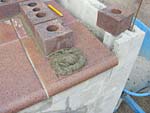
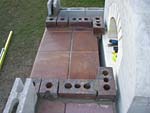
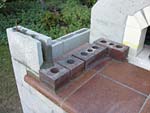
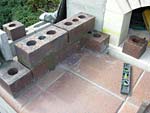
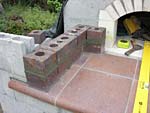
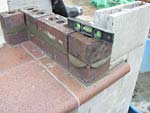
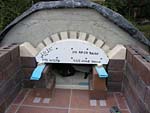
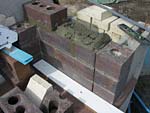
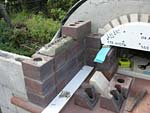
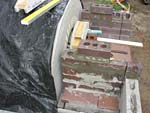
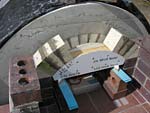
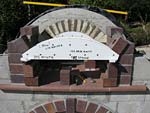
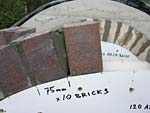
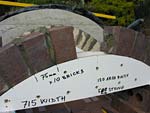
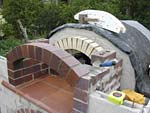
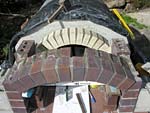
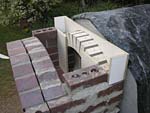
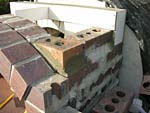
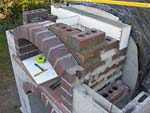
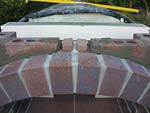
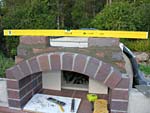
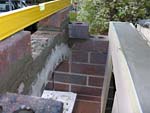
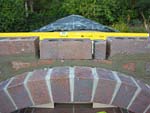
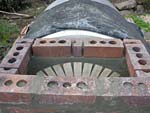
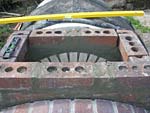
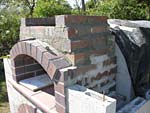
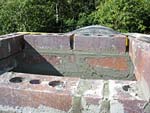
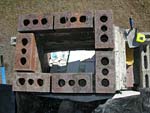
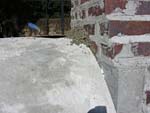
1. This is correctly sized flue vent. Also called hood. The brick box is gradually narrowed upwards forming the hot air passage. With properly sized flue, like this one, 100% of all fumes plus hot gases will travel only upwards where they should be directed. When a flue has improper size, if the box isn’t spacious enough (wide and deep), all fumes will not be dragged into the chimney passage because they all will not fit in nor they will be grabbed (ovens with improper flue size get carbon color markings just above the decorative entrance arch. Also the hood gets unnecessarily hot, it overheats, by being too narrow and not deep enough.) How wide and deep should this vent be to work properly?
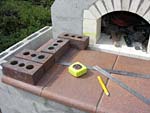
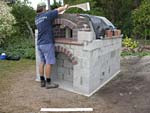
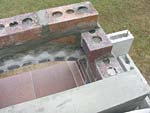
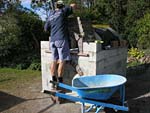
2. Why I put so many images on this page you may ask? Even though here the work involves only a small number of bricks, when you look at -it really consists of only a few bricks, but people really make this flue space too often too small.
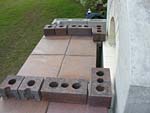
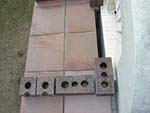
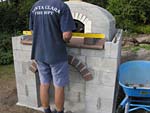
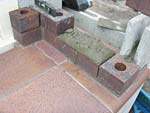
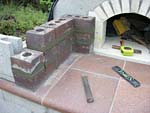
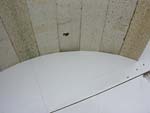
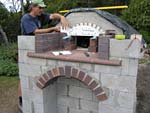
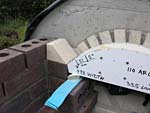
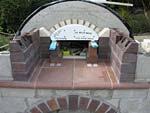
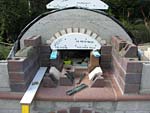
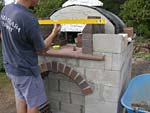
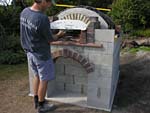
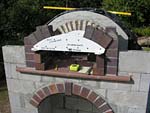
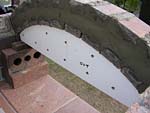
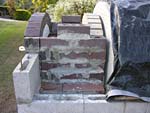
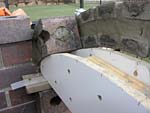
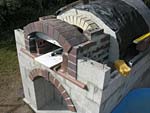
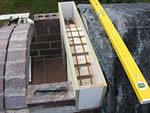
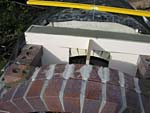
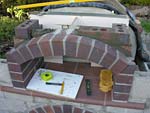
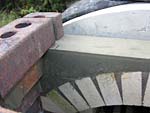
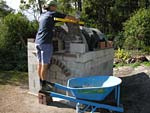
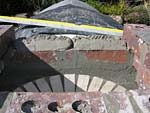
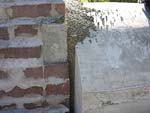
3. Choose how wide you want the hood box to be! It does not matter that much how far apart the two walls are built. In my opinion, the wider the flue hood is, the better. Because both elbows can be put on the flat surface if there is more room, in other words, if the walls are more apart more can be done on the surface – it is very practical and pleasing to have more room in front of an oven.
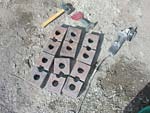
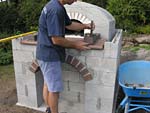
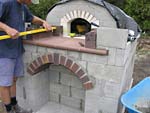
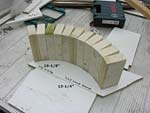
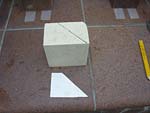
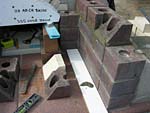
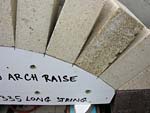
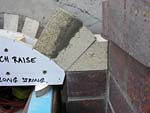
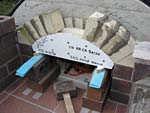
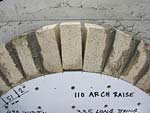
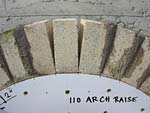
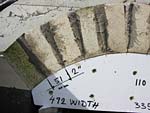
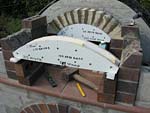
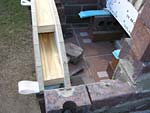
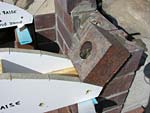
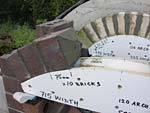
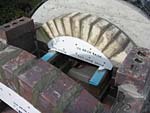
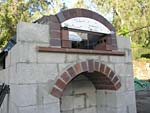
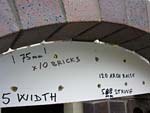
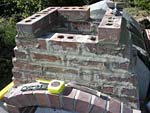
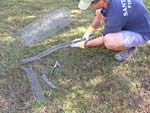
4. According the width of the entrance chosen the entry wooden arch template is then made.
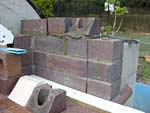
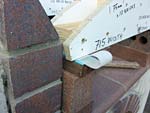
4. One more thing; For making my templates for arch making and for most other boxing, I use material from demolished kitchens. I get it for free, it’s big, has clean and smooth surface for making markings on with a CD marker or pencils.
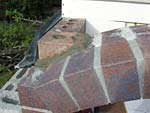
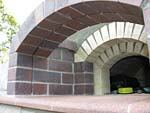
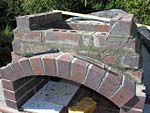
Entry brick arch & vent hood with hot-air passage
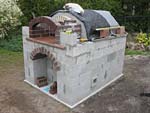
All well sized …


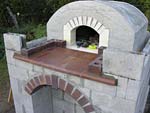


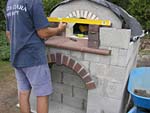
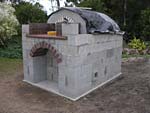

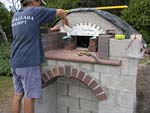
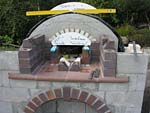


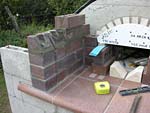
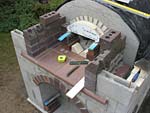
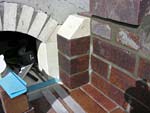
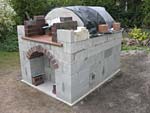

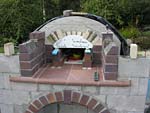
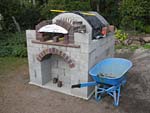
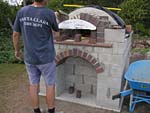

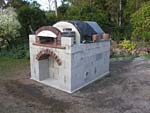
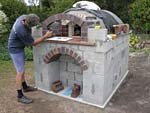
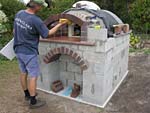


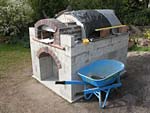
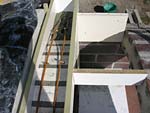
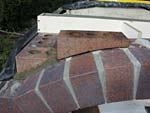
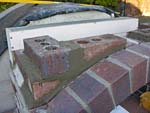
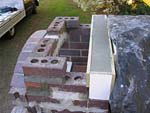
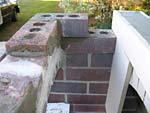

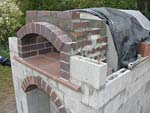
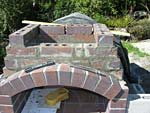
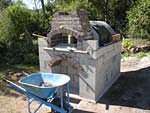

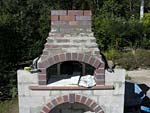


Making “front wall deco brick entrance arch” with “flue hood and hot-air passage” for collecting 100% of all fumes. Step by step progress on this page contains 177/335 photos.
Total images 1862 – 2196 (out of 2,785 from the whole oven building photographic sequence.)
3G MTo main page.
There are also the Swishy oven and Original MTo designs to observe. The brick work decorations on the outside from either of them can be very easily added into this new design. Thousands of them were built around the globe already.
Respond to the Entrance arch & flue hood with hot-air passage article:
15 Comments
Sorry, the comment form is closed at this time.
why do you built 2 arches with 1/2 bricks instead of one with a full brick?
added by Rado:
Hello Renee,
Welcome! Thank you for the question. I will start to make your oven page, with photos showing how you progressed so far?! Will have a couple of days off starting this Friday.
The reasons why I made it rather from two halved bricks instead of one full brick; this whole 3G MTo design is a mini form of a large oven, many large ovens have it done along the same way. It allows heavier use – for instance in business or in cold climates. Secondly, many people ask about how to put the oven indoors behind a wall.
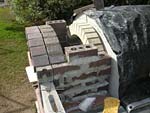
There is a medium heat radiating out from the oven entrance reaching not too far out. That causes the pot resting surface with the whole flue/hood with hot-air passage to get mildly warm and kind of gradually bloat a little. In this concept the inner chimney/lining isn’t part of the front facing wall which includes the decorative arch entry. When the inner hood-box changes this way the move will not effect the front wall. Beneath the pot surface (pavers) there is the vermiculite layer therefore the mass below will not build up heat nor expand.
This is just a one way of making it. Metal sheet could be used as well but I prefer bricks. One could say this concept works like a chimney lining tubes. But chimney linings could not go right down, rather it would connect on the top of the gradually upwards narrowed hood; whilst possibly if the front deco consists of only -the deco wall, -the deco wall still gets the heat.
I believe that for several reasons the whole 3G MTo design will make many people happy.
By renee vankuren
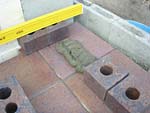
I am ready to build the “pot resting surface” and was wondering what material you used on top of the vermiculite. I have some 12″x12″x 1 1/2″ thick concrete pavers available. Would these pavers be suitable? I’m not sure how much heat would be at that surface. I am following your 3G MTO design as close as possible. Thanks, Dean.
By Dean Foote
Hi Dean,
Yes 12 by 12 inches size pavers 1-1/2″ thick are suitable of course. Even halves 6″ x 12″ would be fine. The pavers I used are made from clay, not completely glossy, still a bit porous. Consider when a bit of cheese or oil etc. mark the surface dirty they can still be cleaned with a dish washing liquid. There is a bit of heat radiating out from the oven just at the entrance, enough for heat difference in material when compared with the outer wall. Can you email me your progress photos again? I would like to see how you go. A couple of people progressed following your metal angle page.
By Rado
Hey Rado,
I purchased your plans back in August and I’m slowly making progress. I’m trying to figure out if offsetting the front vent to the back is possible. Ideally this is how I would vent my oven because going straight up from the front isn’t practical. The oven is located inside of a room and I’d like to send the double wall pipe up the outside wall. I have a 72 inch offset with about 48 inches of headroom. However, my research shows that the maximum angle that should be used in this application with double wall pipe is 30 degrees. According to Duravent it’s not possible to get the offset I need with the limited height above the oven?
Do you have any advice or know of anybody who has figured out a safe way to do this?
Thanks, Jonathan Beard
By Jonathan Beard
Hi Jonathan,
Is it 1ft or 300mm diameter pipe – double-wall stainless steel stove pipe, chimney pipe you will have outside, like on my image below? Maybe at Duravent they calculate all things to their system specifications and their pipe diameter/s, the PolyPro (polypropylene vent pipe).
I just made quick drawing, the 72″ distance from the wall and 48″ headroom space from the top of the vent hood shouldn’t be a problem. If you fit the pipe in tight, as steep as you can go, it might produce better angle than those 30 degrees. Do you have already an existing chimney or still to make one, how about the chimney draft? Have you considered the draft produced by the chimney and also size of the doorway/chimney vent hood? See the page, make sure that the vent is that spacious in width, depth and also height where the pipe actually connects (if you needed to make the hood lower, increase its depth at least.)
Here is one idea for the pipe angle that may help you, Robert also described the chimney on their page, if I remember well. It would have been positive if they made the vent larger, more spacious internally.
A good idea would be to create a removable opening for easy access into the horizontal section, to sweep it easier if it’s of a larger diameter.
* Please email me photos of your progress, we can chat about it. I will be more than happy to see what you do and how you go.
By Rado
Thanks Rado. I was planning on 8″ stainless double wall stove pipe and on following your plans for the doorway/chimney vent hood on my oven. I’m a novice at this and may not be understanding this correctly. Duravent’s calcs about this: You can see the offset chart in their DuraTech chimney http://www.duravent.com/docs/product/DuraTech_L820_2012-sept_w.pdf pg 26 of 28 shows that you could make about a 21″ offset with that little vertical height. Possibly this is based on fireplace calculations that require more draw to vent properly?
Is it possible to use a more horizontal run for a wood oven that does not require as much draw or by using larger diameter pipe?
If I were to do the offset with 12 inch pipe could I reduce it to 8″ for the vertical run up the outside? 12 inch stainless double wall stove pipe would be very expensive.
Thanks again.
By Jonathan Beard
Hi Jonathan,
Thank you for introducing the DuraTech products, they are actually great I must say.
How tall is your chimney going to be? You can use the 8″ pipe for the vertical run. I repeat; make sure the vent will be spacious, high enough too – narrowed upwards gradually into the size of the pipe where you then connect these two. Make it much higher than the vent on the image I attached in my email. Secondly, see the chimney pipe on the restaurant wfo on my page, how horizontally that pipe is placed?! 25 degrees? I am not saying you should do just that, but as you can see with draft it works.
To ensure sufficient and long lasting function, desirable especially with fireplaces, it’s the best to have an overengineered design. So it’s more robust than what is necessary for the intended application. It applies mainly to the vent hood for it collects 100% all fumes without any doubt. There is no problem to make it even twice as spacious. This is of course if there was more room for doing something like that, or at least slightly more room otherwise, to eliminate design errors, related to safety or performance. Into the hood of some of the old fireplaces a person could walk in. Over-engineering isn’t always wasteful (not like with overcomplexity.)
By Rado
Rado,
I just opened and looked at hundreds of your photos.
I was in the construction business for 30 years before I retired.
You are the neatest, most detailed person I have ever seen. Whatever you are paid, it is not enough. Your attention to detail is extraordinary.
You have the best set of hands I have ever seen. My hat is off to you. I would never be able to do what you do, but your photos will help me to maybe build a more simple design on my patio.
I would pay to watch you work. I live in West Palm Beach, Florida.
We have construction people here, that are the worst in the world, I once spoke with a carpenter who told me there was no need to own and level. Seeing his work, I believe he did not own one.
Thank you,
Richard
By Richard
Dear Richard,
What a wonderful words you used, thank you very much! It feels great Mate. You must be one of the people with the highest moral caliber, in this fast life/stage we live in currently.
Perhaps I should invite groups then to build oven-s with them, as an educational classes for learning this old building art.
By Rado
Thank you Rado, I truly appreciate how you willingly share your wealth of experience and I look forward to beginning my build here in Canada. I have a commercial Italian oven mounted in a trailer that I have used in the past for a mobile pizza company and am excited to build a small-scale one at home for personal use and friendly gatherings.
I have also been extremely fortunate to actually get all my building materials (fire brick, concrete blocks, building bricks etc.) for free (trade) so this whole process has got me all riled up and anxious to get going once the rain stops outside.
I’ll zip you some photos when complete and can’t wait to do so as it means that I’m almost ready to fire the oven.
:)
Warm regards and MANY thanks!!
-David
By David
Hi David,
Thank you for your nice words! To see your oven photos would be great, I am always thirsty to look at and think about what goes on around the globe regarding wood fired ovens building or cooking, baking, and so on anything else.
Yes! Logical. This is the best way for getting building material! There is so much of it around, left over and unused which none wants.
By Rado
Hi Rado, thanks for your great site, I’m a concretor/plasterer/Builder (53 years old) and am wanting to put together a brick oven. I like the barrel style. I understand you run a business however I just want to ask one question. Some oven makers have the barrel oven flue opening at the top of the barrel roof with no drop down. Is this effective? I thought to much heat would escape. I’m doing a brick oven with a thick floor insulated properly etc. I wanted to do a pretty simple oven. Should I bother with dropping the flue level down to the door section height? Sometimes I see simpler barrel designs with the door opening to around 60 percent of the interior roof height. Kind regards Brendan
By Brendan
Hi Brendan,
The simplest oven you can use is an oven without a flue, here where the fumes and hot air exit straight from the oven entrance. The performance will be the same vs. the same oven with flue in the front of the entrance (as in the design on this page.) Still this way the oven operator gets too close to the entrance and the fumes and the heat. Plus a wind can shift it anywhere unpredictably.
Exactly as you say regarding the efficiency. But if you only make pizzas it would work somewhat with the constant heat source from the active fire. To make it better by a small adjustment; if the flu has to be inside the oven in the vault (e.g. if there is not enough room space in its front) it would need the flu inserted/dropped down into the chamber. Around at least 100mm = 4 inches downwards into the chamber. This way the heat will be stored in the area inside held under the ceiling. Which logically helps immensely. Hypothetically if there was the flue hole flushing right at the ceiling hot face then the heat escapes easily. And that is not rare lately I’ve noticed. Once done that way people usually try to work out how to improve this (when they intend to do a more advanced cooking or baking.) If you do not have for example the extra space for the hood box at the oven front, sometimes this flue hood with the hot air passage on top of it can be done out of a thinner material, compared to house bricks, ei. metal sheet (a nice copper, or corrugated iron riveted together, etc.)
By Rado
Hi Rado, is there a structural reason behind the splitting of the arch, or can it be done with a full brick instead?
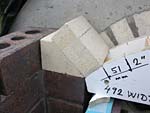
Also, for whatever reason mine brick hood comes out to be an extra half brick deeper compared to yours (different brick’s length?, mine are 7 3/4 inches long).
If mine turns out to be deeper, do I need to adjust the internal dimension of the chimney flute? I don’t know if there is a correlation between the front opening of the oven and how wide internally the chimney should be!
Thanks,
Lucio
P.S. construction halted for a long time, but I am back now!
By Lucio
Lucio,
My apology for this delayed reply to you, I am remote away from home right now.
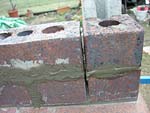
If you are using 7-3/4 inch long bricks to put together the vent/flue hood box, might be that one extra brick length was added to the sides. My bricks are probably also marginally wider, 110mm approximately 4-1/4 inches than yours I think, but that does not matter at all. You can always cut these bricks easily to make them shorter, specifically those within the inner side walls. Bricks I used here are 230mm = 9 inches in length.
The brick box can always be made deeper, however by doing so you will increase the pot resting surface size by that also (won’t hurt.) And if the internal vent/flue hood gets deeper this change would not influence the proper function of this vent negatively, because the extra depth would only help in collecting fumes and hot air, basically nothing would change in that regard.
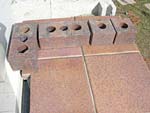
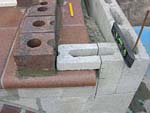
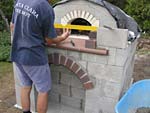
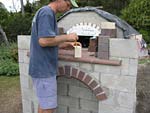
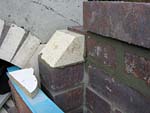
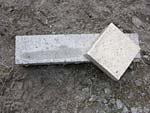
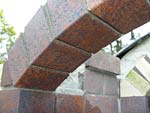
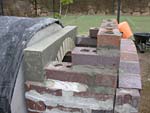
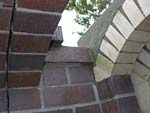
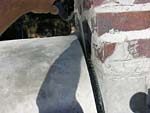
The front decorative arch is made out of split bricks, two halves, which are separated by a little gap between them, because this way the front deco wall stays cold as is set apart from the actual vent which changes temperature – thus also its size slightly. This improvement prevents the front decorative wall expand with the hood, thus not developing potential visible cracks in the decorative facing wall this way. The outer arch is the part of the outer facing walls and the second arch behind it is part of the flue.
Additional reading on the flue-vent sizing and how to properly calculate its volume, spaciousness.
By Rado