Earth bread cob oven by the sea
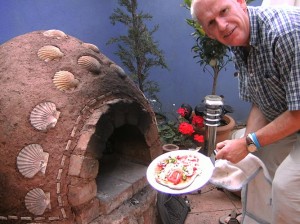 Hi All. I started and finished building this earth cob oven last year. I kept visiting a building site every day to get the clay/mud mix and then would spend 4-5 hours in the evening treading and mixing the sand with it. Article about how to use a local fire clay collected in the nature for building clay pizza ovens. So far we have cooked pizza’s, bread and roast potatoes, Mediterranean vegetables and roast lamb with garlic and rosemary. It’s amazing pizza’s cook in about two minutes when the oven is really hot. Gauging the temperature is a process of trial and error. I now wait until the outside gets warm before starting the cooking. It usually takes about two to three hours with mid-size fire. Am looking forward to possibly getting some suckling lamb or pig to slow cook with garlic.
I read somewhere to test the temperature put you fist in to gauge the temperature … the hairs on the back of my hand singed immediately. I guess that told me it was very hot! It is great to have a table nearby the oven to place all the pizza toppings so that people can choose and make their own. The children love to do it.
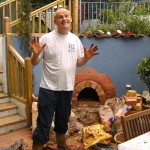 Treading the clay/sand. The base I made of local stone and for insulation laid wine bottles on their side and used a clay/sawdust slip to fix them. I also used insulation blocks to provide more insulation, then a layer of sand onto which I laid the oven bricks.
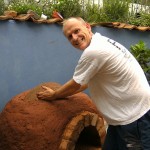 The insulation layer I made up of a little sand, clay, straw and sawdust. I found treading the mixture was exhausting and like going on a very long run. My legs ached for days afterwards.
 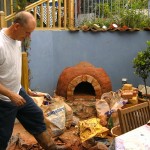 Its very good aerobic exercise and really good for keeping fit! I used to put music on so that I could get into a rhythm when I was treading the mixture.
This was when I was completing the insulation layer of straw sand sawdust and clay. 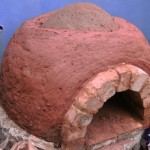
The finished clay cob oven
I decorated the earth pizza oven with scallop shells partly because I live by the sea and also because I have a love of Spain and the scallop shell is the symbol for the pilgrimage route of the Camino de Santiago in the north of Spain. The sense of achievement I felt at completing the project was amazing. I had never really done anything like this before and it was a real adventure and something I never felt I would be able to do. It took patience and practice but I found it incredibly worthwhile. 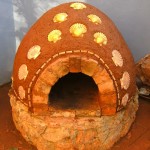 I have fired it up twice this year so far. I light a fire in the oven for about three hours before cooking. When the outside starts to warm up I rake some of the coals out and then push the rest to the sides. The pizza’s take about three minutes to cook to perfection. Then I put a door on to let the oven ‘soak’ a little and time for the temperature to even out. Then I rake the rest of the firewood and ashes out. Then it’s time for cooking bread rolls, the Ciabatta breads made from wheat flour and yeasts we made last time were delicious. Sometimes I fire it up again for a short time and then put a roast in. Lamb infused with garlic and rosemary with a generous splash of red wine. The flavors just melt into each other and it tastes out of this world!
The first time we made Pizza I put them on a paddle. I went to put them in the oven … the toppings flew into the oven and I was left with the pizza base! I have since found out if you sprinkle rice flour on the paddle it should help with ease of delivery! I came up with another solution … I put a piece of slate in the ordinary oven and put the pizza base in for about a minute and it firmed it enough to slide off perfectly. Once you have tasted a pizza from the oven you would never buy another pizza; they are delicious!
Thinking of a cob oven building? Go for it!
I hope these photos inspire some of you to undertake a project of cob oven building. It is something I never thought I would be able to do… so if I can do it anyone can. Good luck!! And a big thanks to Rado and his website. His enthusiasm and expertise are phenomenal. Thanks Rado!
Respond to the Earth bread cob oven by the sea article:
7 Comments
Sorry, the comment form is closed at this time.
This is a valuable information for building bread earth clay cob oven. Especially as you describe the mud with sand preparation and the bottles for building a heat insulation under the floor for the cob is an excellent idea … thus the dense part retains the heat well. Ta Mark
By clay cob oven building
Congratulation on your cob oven Gerry. Looks real nice. I built my cob oven a year ago with a roof above to protect it from rains. It cooks and bakes really well. The only thing is that it’s very small hence now I am building a larger oven from Rado’s plans.
Mark, I reapplied the outer insulation layer to improve the efficiency of the earth oven. The best insulation for cob oven is made from dry grass (dried on the ground after it was mulched in the cutting process) which is mixed with very soft clay. Mixing in volume roughly 4 to 1 grass/mud. It is easy to place on after the cob is built and it dries fast without cracking. This insulation can be also shaped to give your cob oven some interesting creative look.
By Perry - best insulation for cob oven building.
I would use Straw or Wood-chips rather than dried grasses. Grass and Hay contain seeds that can germinate or rot.
By Jon
I would like to follow your inspiration about this kind of material and build my own earth oven.
By Scott
I am also thinking of adding vermiculite on top of my first “mud oven”, to make it extra more efficient and hot. Mark
By The insulation on my mud oven
I want to build one of these ovens but where do you get the clay and is the mixture for the insulation layer 4 to 1 or what. Pounds, bucket fulls or what. I can dig the clay but how much sifted clay do I need to build one of these ovens. 10 5 gallon buckets, 14lbs of clay. I see plenty of sequences of building the oven around the web but no information for mixture ratio and do I have to get all the little rocks out of the fire clay before I can use the clay?
added by Rado:
Hi Jeremy,
Here is my version of building mud ovens, with (fire)clay adobe prepared prior the actual oven building: what is fire-clay, how to get fireclay outdoors in the nature and when / how to work with fireclay.
By Jeremy
I am planning on building a cob oven. I am unable to locate clay in the wild so am forced to purchase it. What would I ask for and will fire clay work or is there a clay that is commercially made that I can use? Irv
By Cob Oven