Concrete over vermiculite – No roof
Rado,
Hello, and thanks so much for everything! It was a great help to have so many pictures to look at, I built the new MTo. Any questions I had, could be answered by looking ahead to see what the end result was.
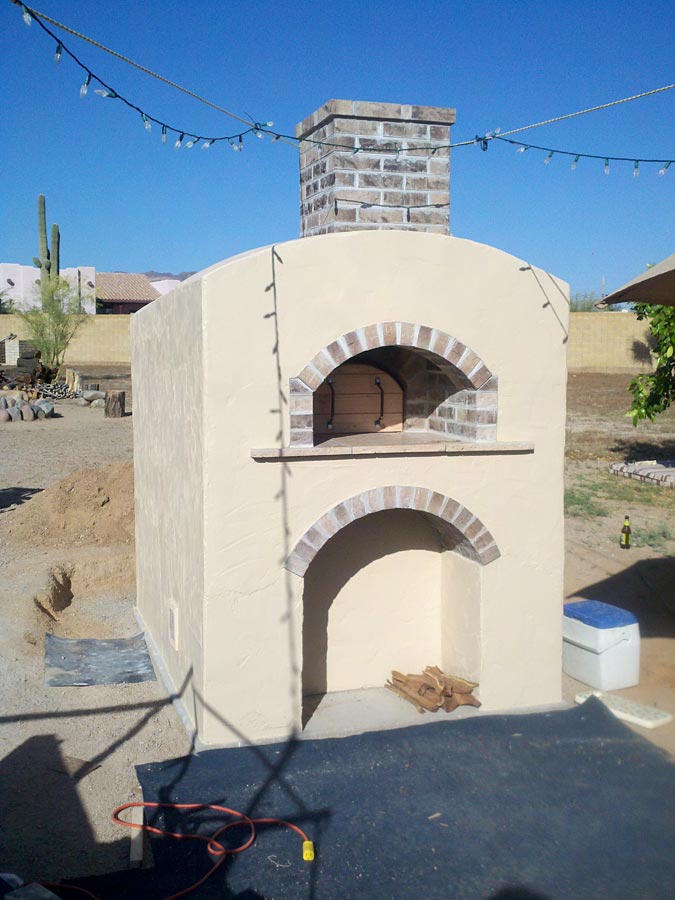
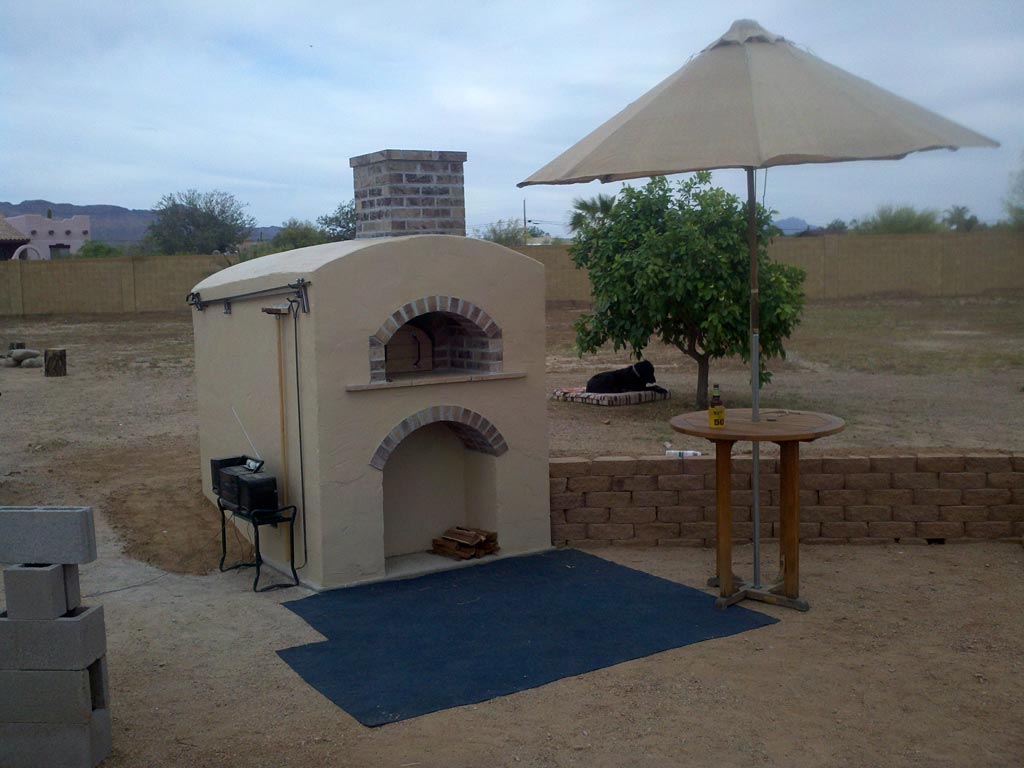
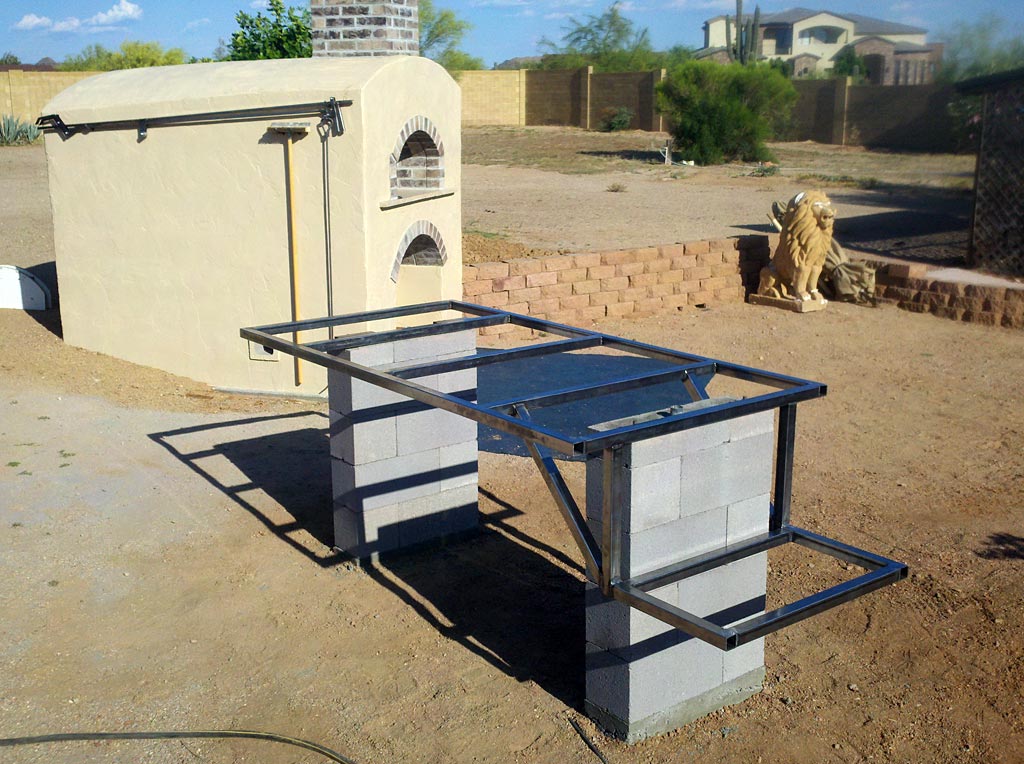
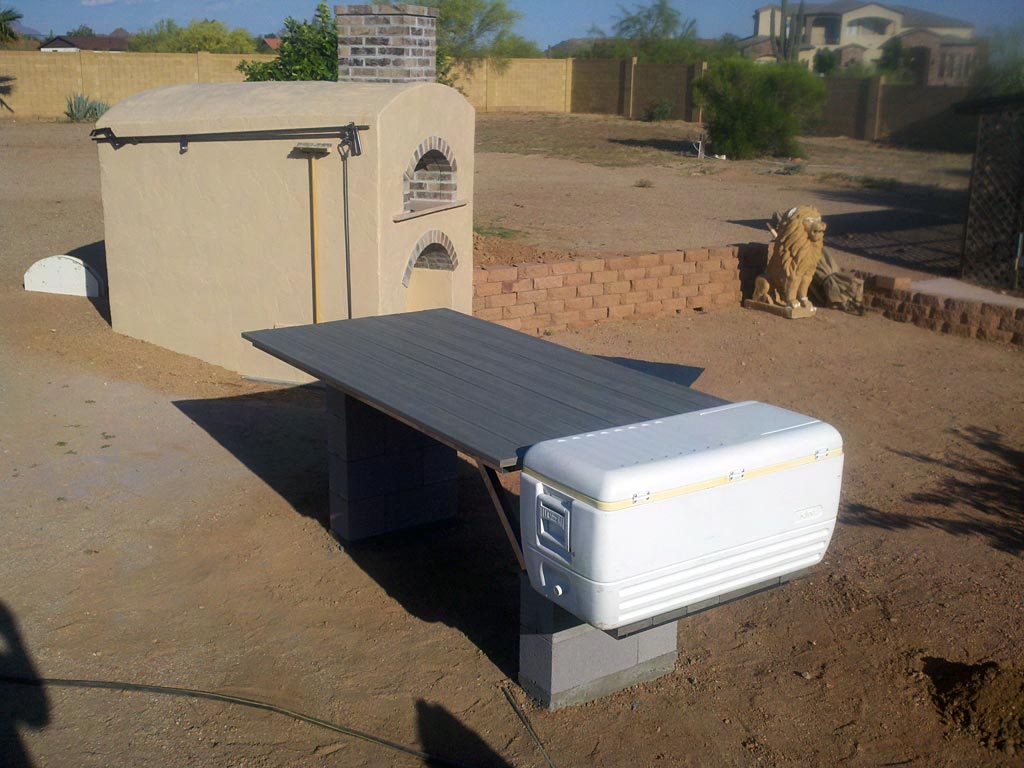
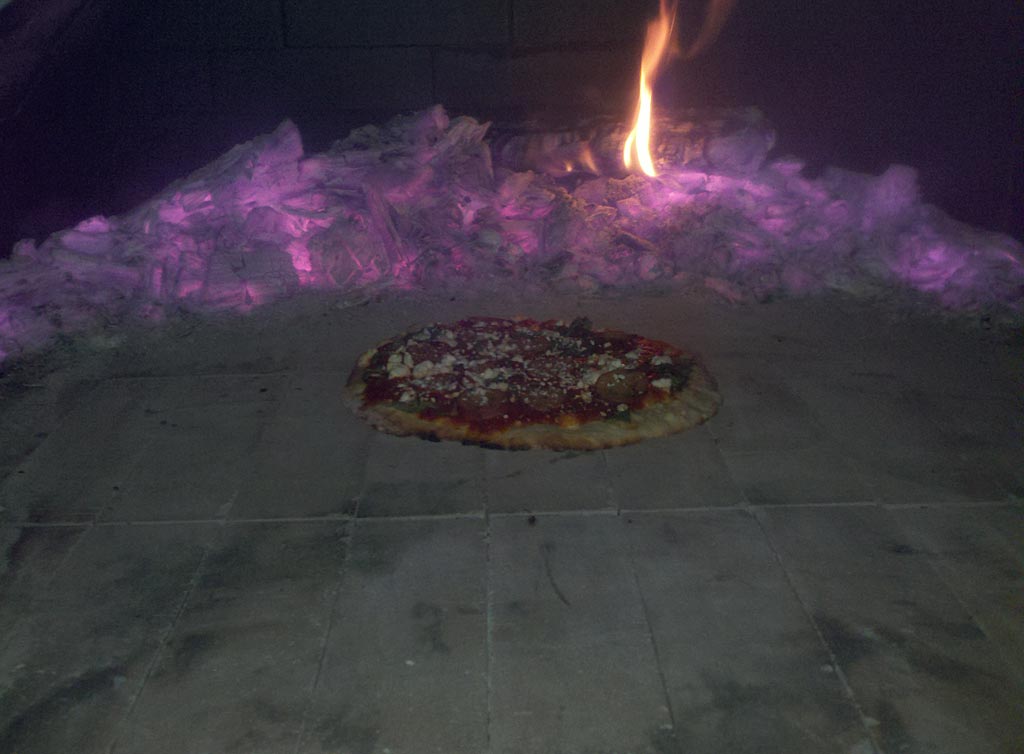
Here are some pictures of my work in progress. Oven first, almost finished with a pizza prep table. Pavers, shade, lighting and who knows what else are still ahead.
Cabo, our dog has been a great oven boss, she is the project overseer, from her many vantage points. She now knows where her favorite ….. pizza crust comes from :-)
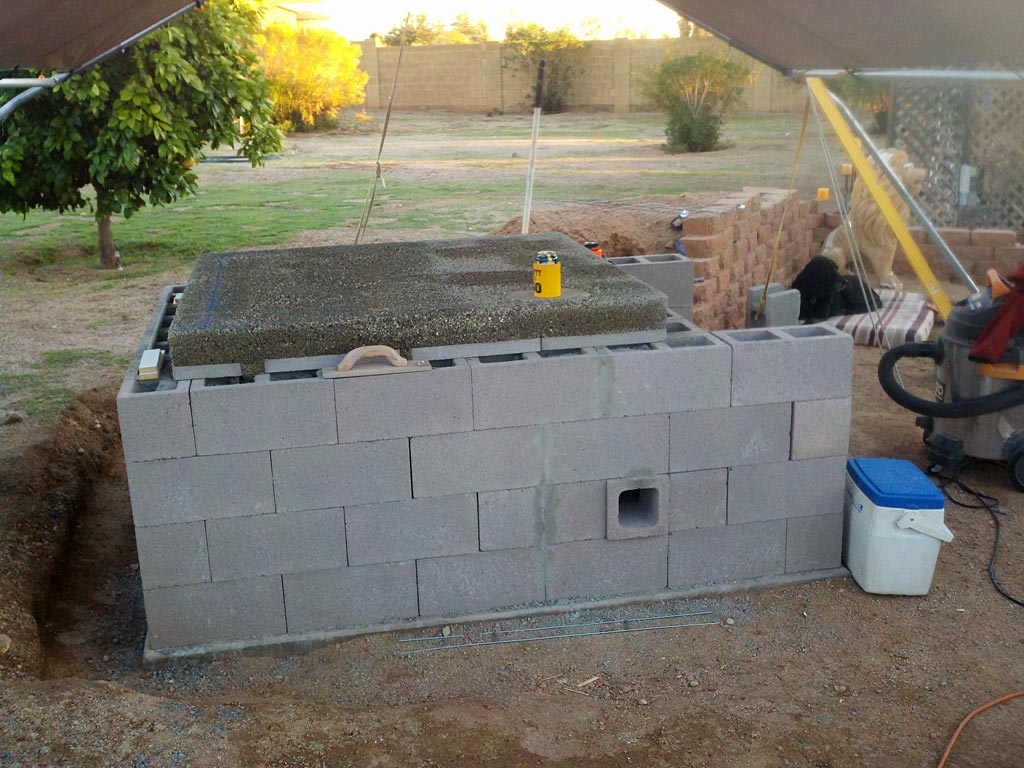
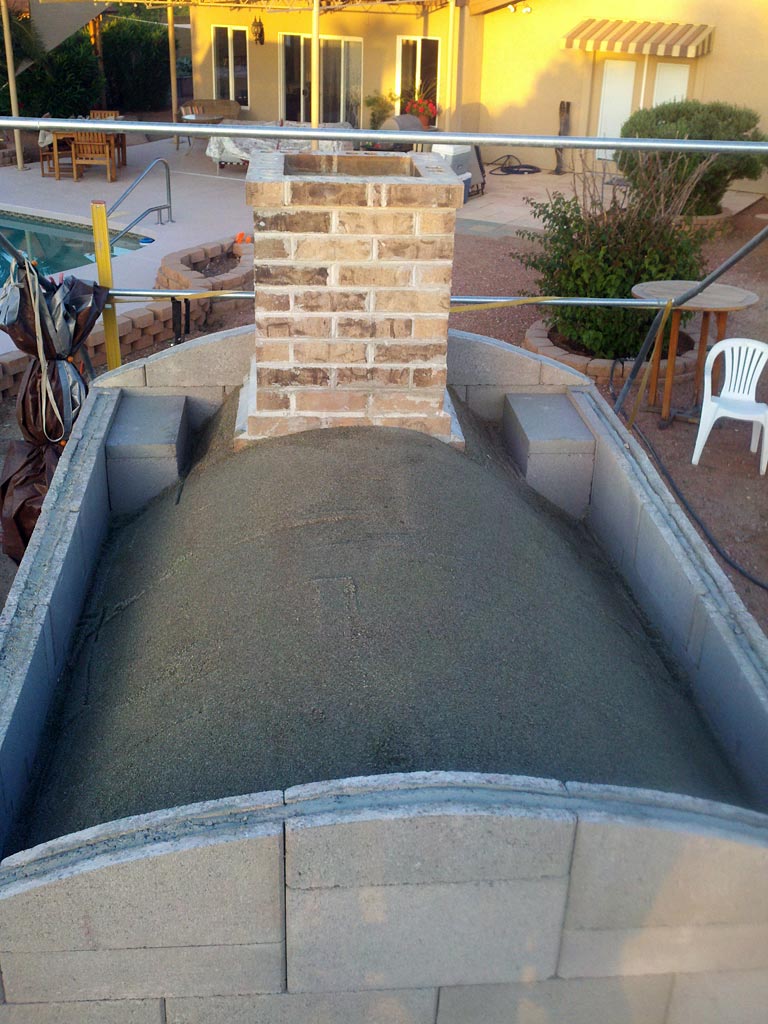
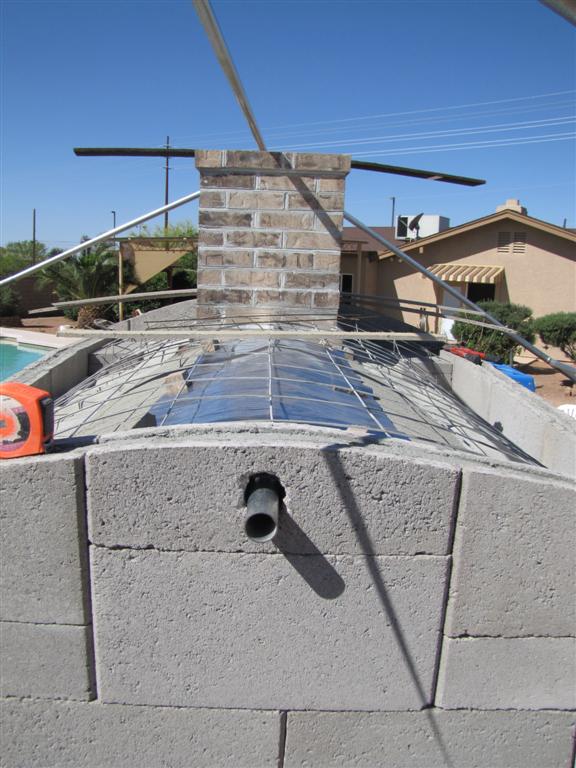
 What I did was concrete over the vermiculite layer. I was concerned about moisture inside, so I used a section of pipe, cut vent slots in the bottom, cut a hole in the back wall and placed it on top of vermiculite & out the back wall.
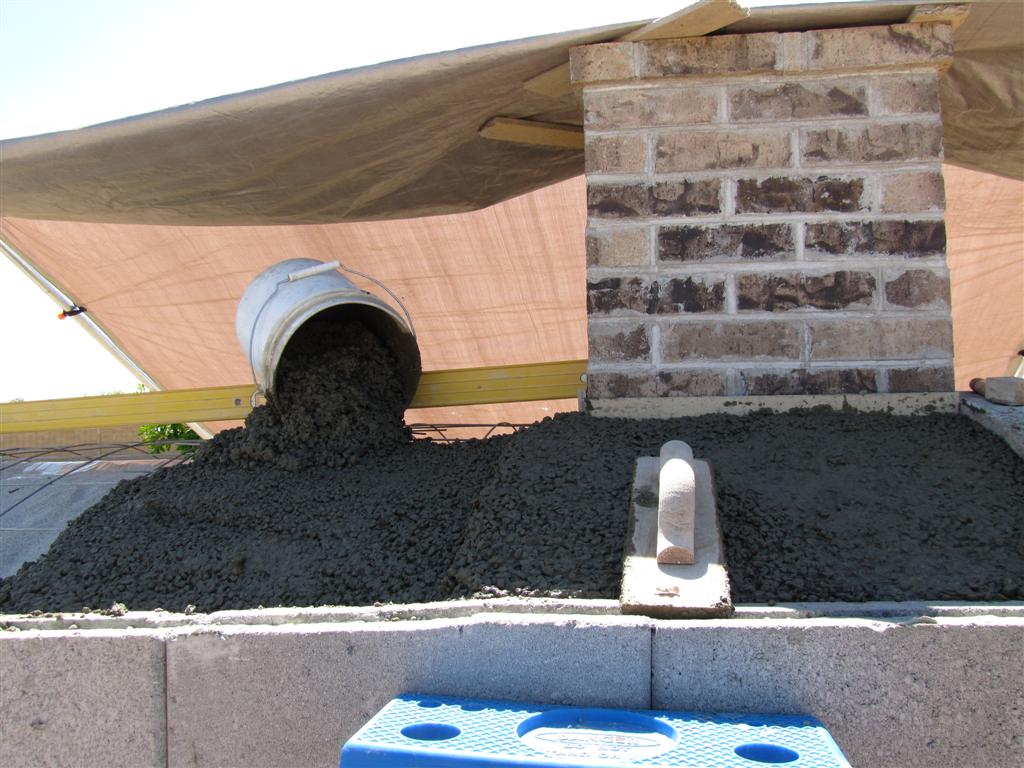
Then I put a layer of foil over it and some sand down the sides to allow venting and capped it with concrete. After the oven was fired and cooled the next day, moisture was dripping out, so the steam vent worked. I used expansion joint material around the chimney, cut it flush and sealed it after painting with a flexible sealant.
I now get calls from my friends when a mesquite tree is down or needs cutting, I have quite a collection in my yard for future cooking.

I also made a tool to grab a chunk of wood and be able to place it in the back of the oven gently, with ought having to throw it …. Works good .. (this tool is mounted on the side of oven.)
Thanks again, take care!
– Kenny from Arizona US –
Respond to the Concrete over vermiculite – No roof article:
3 Comments
Sorry, the comment form is closed at this time.
Hi Kenny,
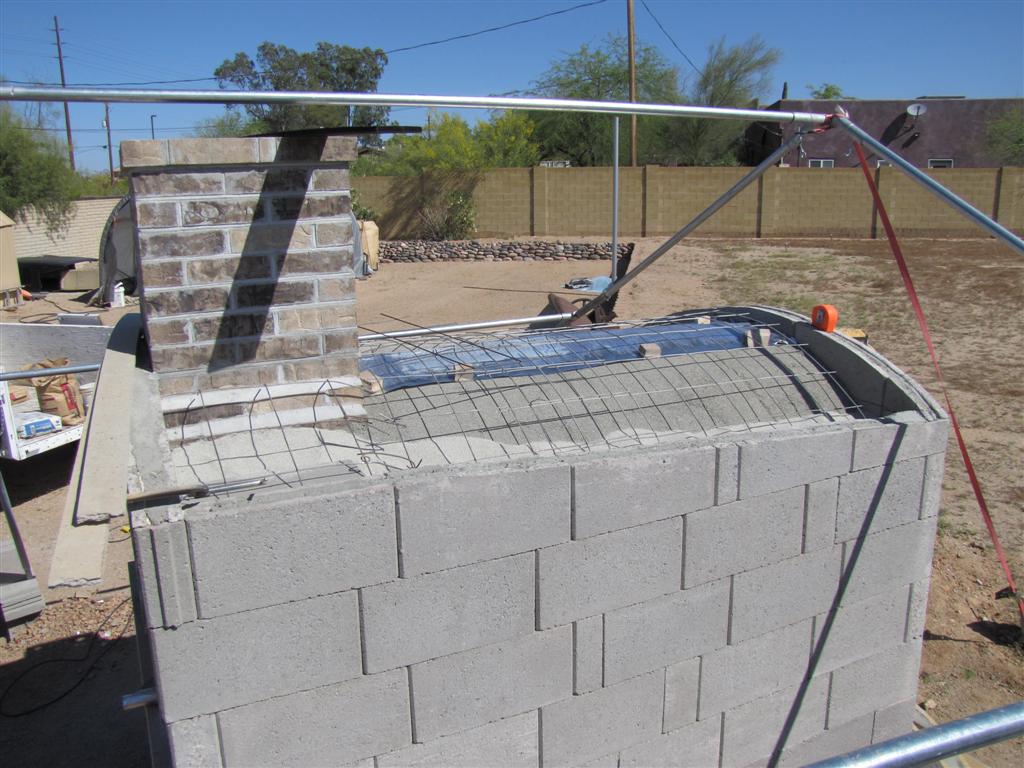
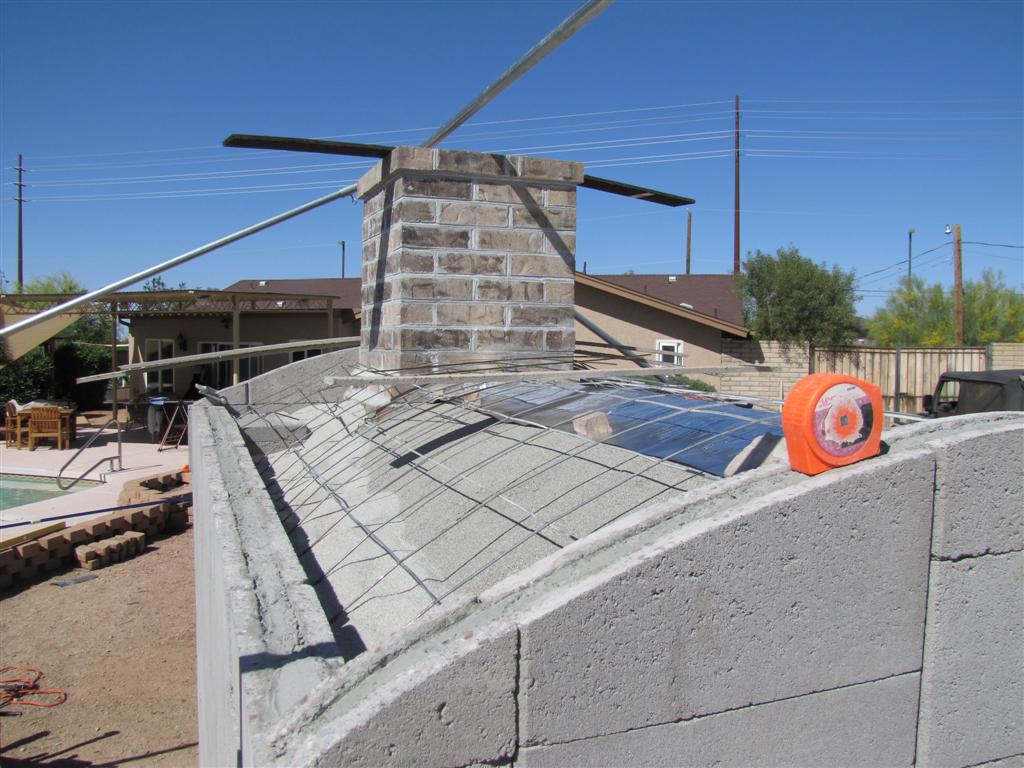
Your oven looks great. Congratulations on some amazing work! How did you manage to cut such a nice curve for the roof using the cinder blocks? I just completed cutting some cinder blocks for an ash slot; 3G Mto version, and it wasn’t pretty!
Best,
Naeem
By Naeem
Hello Naeem. If your marking for the cuts on the blocks or the block work will be nice then, if you cut slow and nicely along the marks, the cutting will end up nice as well. These cinder blocks & block work are fairly easy to cut with any small diamond wheel. I am at the ash slot stage too. Had many blocks left oven from my house extension project … plenty of block cutting was done there. I am building this 3g mto but larger by one block length in each corner/course.
By Joseph
Naeem,
As Joseph said, it’s the diamond cut-off wheel, I used a 4 1/2 inch wheel extensively & for some of the blocks a 7 1/2 in in a circular saw, along with a chisel and a gentle tap or three. Make sure the blocks are all in position, use a string, like making the arches, or a long thin ruler or piece of wood that will bend consistently, to make an arch.
Important to have a line to follow, you can also make a cardboard template, mark both sides of the block, don’t just try to eyeball it :)
Good luck…. & enjoy!
Kenny
By Kenny