Baking grandma’s bread
I was raised on food that came out of boxes and kits. My mother’s generation grabbed a hold of anything that declared itself “new and improved”. Casseroles meant “Hamburger Helper” and vegetables meant grabbing something and dumping it out of a can. Potatoes came in the form of a flake and just needed to have the addition of a little hot water, some milk and some margarine. Margarine, not butter. And the cheap stuff was referred to as oleo, or olie. It didn’t have much to offer in terms of flavor, but it did make it slide down a bit easier.
Then I got married. It’s a good thing we were living on love because the food budget was just $20.00 per week. The days of kits were over. For less then the price of Bisquick, I could buy the flour. Then I could make more then just biscuits and pancakes. A new realm of cooking opened up to me. From a handful of ingredients I could make pie crust, dumplings, cakes, noodles and so much more. It seemed I had a knack for baking… until it came to bread. Then one day, after yet another failure, and my husband’s comment, “Keep it up! If you keep making these bricks, we’ll be able to build ourselves a house.”, I decided to get advice. I turned to my husband’s grandmother. We set up a time for a visit and made plans for baking.
The big day came and I sat at their very small table in their tiny kitchen, notebook and pen in hand, ready to receive her knowledge. She gave me her recipe from memory. Telling me about her tips as she went. There were small stories as well, about when Grandpa and Grandma were newlyweds themselves and Grandma would make the bread and Grandpa would come to the kitchen and knead it for her. Stories of egg-less baking during the depression. She told how she supposed someone had measured it out sometime but she just added the flour until it looked right. I could see the dough change and could feel the consistency of the mixture at each step. There is some information you can’t get out of a book and the feel of a good dough is one of those things.
Since that day with Grandma Pat, I have not baked a single bad loaf of bread. Some have been better then others but not a bad loaf in the bunch. She told me that a woman had given the recipe to her when she was young. Grandma Pat was in her early nineties when she passed away. I have been using this recipe for thirty years myself, and now I pass on this very old, time tested recipe. I hope it adds as much to your lives, meals and festivities as it has for my own family. Enjoy!
Grandma Pat’s Bread Baking Formula
- 9 cups Flour
- 2 pkg. dry yeast ( 2x sachets )
- 1/4 cup white sugar
- 1 teaspoon white sugar ( read description )
- 4 teaspoons salt
- 1/2 stick of butter = 1/4 cup – 2 oz ounces – 57 g grams – Butter measures converter
- water
Now Grandma said that she figured someone had sometime measured out the amount of flour for the recipe. Personally I find that it works well at about 7 1/2 cups of flour, depending on the humidity. Too much flour and your bread will become tough.
I like to start with a big ceramic bowl. I have a designated bread baking bowl and I start by putting hot water in it just to warm it up. Dump the water after a few minutes.
In your bread bowl, add 1 cup warm water between 100 to 110 degrees Fahrenheit °F ( 38 to 43 Celsius °C ). I usually just check it to the inside of my wrist like you would a baby bottle. To this water you will add the yeast and the teaspoon of sugar. I usually buy my yeast in bulk so in that case measure out 2 Tablespoons of yeast. Set aside and let the yeast bloom, about ten minutes. ( If your water is too hot, you will kill your yeast and your bread won’t rise. )
In another bowl, add 2 cups of hot water, 1/4 cup of sugar and the 4 teaspoons of salt. The hot water helps the sugar to dissolve. It will cool down sufficiently by the time the yeast blooms. And now is the time to melt that half stick of butter … don’t burn it. If you need this Butter measures converter to exchange in between various butter measuring units.
When the yeast has bloomed, stir in the sugar-salt solution, gently. Now add the first three cups of flour and the melted butter. Beat by hand. ( If I am making wheat bread, I make the first three cups Whole wheat flour and finish off with the white flour. ) Continue adding the flour, a cup at a time. when it doesn’t seem to want to take much more by stirring then turn it out on a board and knead. Grandma said to knead and continue adding flour until the dough blisters. For me, I knead until the resistance of the dough feels like the cheeks on a new baby’s butt. Pick your method.
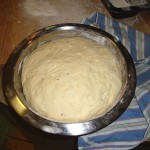
 Then add about a tablespoon of oil to your bread bowl. Roll your loaf in it and then cover with plastic wrap and let rise. When the dough has doubled in size, knead it back down ( about ten turns should do it ) then return to bowl, rolling it in the oil again and covering with the plastic wrap. Let rise a second time. Knead down again. Divide for loaves. This recipe will make three standard loaves. Place dough in prepared loaf pans and let raise until it is approximately an inch taller then the sides of the pan.
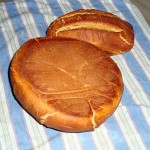
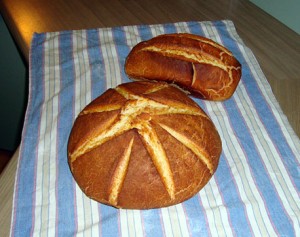
 Grandma’s baking instructions were to bake in a 375-400 degree F ( 190-204 degree C ) oven for thirty minutes. But people liked a heavier crust on their bread back then and they baked in ovens that didn’t have door seals, so for my families likes, I bake at a bit less then 375F ( 190C ). You know it’s done when you lift the loaf out of the pan and thump it lightly on the bottom and it sounds hollow. ( I prefer Pyrex bread pans cause they release better and you really can lift the loaf that way, but hot Pyrex does not like water, so watch for wet spots or damp towels. Hot Pyrex will explode when hit with cold water. )
I’ll write again when I get my outside oven built. I can’t wait to see how Grandma’s bread recipe works out as a farmer’s loaf in a traditional oven. Louie’s Blog: Renaissance woman meets reality. Pictures for web page are on the way.
Louie
Respond to the Baking grandma’s bread article:
No Comments
No comments yet.
Sorry, the comment form is closed at this time.
