Making sourdough culture with bread baking formula
On this page you will learn all about my sourdough starter and dough-making formula for baking these special hybrid sourdough breads.
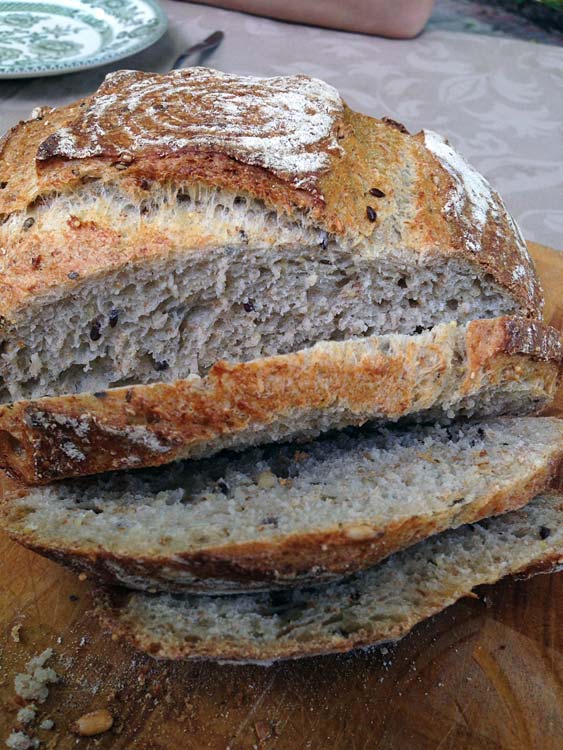
This is the complete formula of our favorite hybrid sourdough bread we often produce and obviously we enjoy a lot.
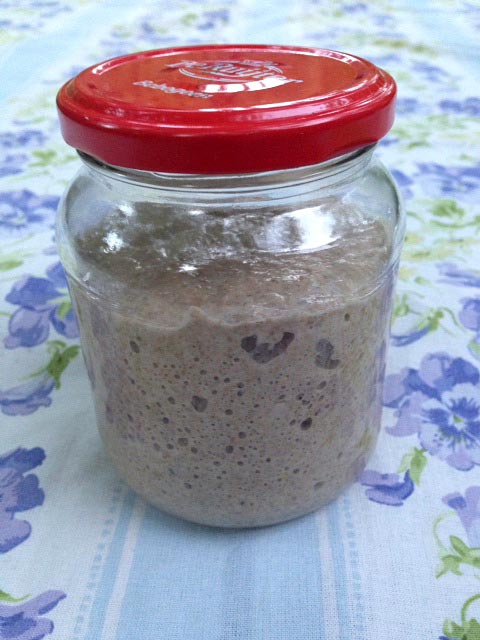
I also made a picture (purposefully for this tutorial) of my jar with sourdough culture as I usually make it. On this photo, the culture was just refreshed and behind the glass the bubbles in the culture are clearly visible.
Just see for yourself if you wish to use a sourdough culture and to make the true sourdough breads. In my previous page, also regarding sourdough bread, you may read more interesting or important insights from me about this baking art.
Making the starter with the dough
- Starter :
- 20 grams sourdough culture
- 110 grams bread flour
- 110 grams water, room temperature
Make the starter first by mixing the sourdough culture, bread flour and water. Stir until well mixed, no longer. Cover with cling film (else called Cling Wrap) and leave on the bench at room temperature for approximately 12 hours.
- Dough :
- 240 grams starter
- 360 grams water
- 400 grams bread flour
- 100 grams whole grain flour
- 100 grams multi-grain mixture, nuts or any filling of your liking, it’s individual
- 3 grams yeast (instant, dried)
- 13 grams (sea) salt
Knead the ingredients, except for yeast and salt, for 2 minutes until well mixed. Leave covered for 30 minutes (autolyse period, important for developing the gluten). Add yeast and salt and knead for 6-10 minutes until you have a well developed dough (check the Internet for the window-pane test, which is THE test to check the gluten development in your dough).
Leave to rest for 30 minutes.
Do one stretch-and-fold. ( S&F ) In a S&F you put the dough on the bench, carefully stretch the dough to the right and fold back one half. Repeat to the left, top and bottom. Again, S&F is for further development of the gluten structure. Again the Internet contains plenty of instructions which helped me a lot to develop my technique of S&F in baking.
Leave to rest for 60 minutes.
Shape the dough to your liking; I prefer a batard for this bread. Make the batard by putting your dough on a slightly floured bench and carefully pressing the dough in an oval shape possibly without releasing the gasses from your dough. Now roll your dough (from the short side of the oval) tightly by carefully closing the seam during rolling. Obviously, again the Internet is also your great help here! Use a cloth or a proofing basket to make sure the loaf maintains its shape during proofing, which is the final fermentation in other words.
Leave to proof for 60-75 minutes.
Here it comes to baking The Bread
Bake in your oven when the temperature is about 430 Fahrenheit (428 degrees F) = 220 degrees Celsius. Spray the walls of the oven with some water to create steam for a good crust development. Bake for approximately 40 minutes. For electric ovens: bake in a pre-heated oven of 240 degrees C = 465 degrees F and turn downwards the temperature to 430F = 220C at the time when the bread is placed in the oven. Turn down once again to 390F = 200C after 20 minutes to the baking is finished. For a good crust generate some steam in your oven by putting some ice cubes in a heat resistant dish at the floor of your oven and open the oven door just very slightly during the last 5 minutes of baking.
Note 1 : this bread may well be baked as a full sourdough without yeast, just experiment little with the resting and proofing times. Typically you would need to add 2 times of resting for 30 minutes, each followed by a stretch-and-fold (so three S&F in total) and extend the final proofing time to 120-150 minutes.
Note 2 : temperature in bread baking is always a tricky thing. I am usually not too precise, but if my kitchen is warm I make sure that my dough is not getting too warm by adding water that is little cooler.
Note 3 : the formula assumes the use of a dry multi-grain mixture or dry nuts added into the dough. If, however, you prefer to use a pre-soaked grain mixture (which is advisable to do when using larger grains …) or wet fillings such as fruits, cheese or onions, you need to adjust the amount of water slightly. If it’s not a dough type you’ve practiced with already many times before; always better in making your dough to add 80% of the water right away and use the remaining 20% (or more if needed) by looking at the state of your dough. Sometimes you might not even need more water. Practice makes the master!
An additional note about the fridge part:
Note 4 : Directly after shaping you might want to go for retarded proofing of your dough in the fridge overnight. If well proofed, bake your bread directly from the fridge. If the dough appears somewhat under-proofed, simply give it some extra proofing time at room temperature before baking. I sometimes use this retarded proofing, e.g. in those situations when for example the family decides to go out when I’m in the middle of baking this delicious bread ;-). You have got to try this refrigeration – Find out more about that in my previous article.
Cheers,
Chris
Respond to the Making sourdough culture with bread baking formula article:
No Comments
No comments yet.
Sorry, the comment form is closed at this time.