MTo firebrick Walls part 1/3 building sequence
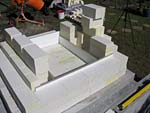
Making wood fired oven inner firebrick part walls with common heat resistant firebricks. These firebricks can be the low duty kind. It doesn’t have to be a high alumina content firebrick type. Around 23% or even less alumina content in the brick body is fine.
(Most firebricks currently on the market are the higher duty kind, to withstand a lot higher heat, with 30% + or even 40% alumina content.)
Masterly Tail oven design (3G MTo) – 3G MTo Main Page
Pointers:
1. Due to the very long/clear photo sequence for the firebrick part building, and to show as many details as possible, the whole firebrick part building progress was split into 3 pages:
Page ONE – Page TWO – Page THREE
2. Firebrick hearth floor also has its own page.
6. MTo firebrick walls – Part 1 of 3

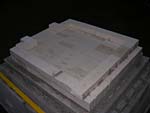
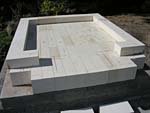
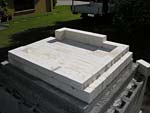
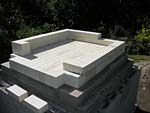
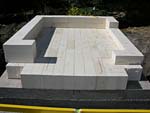
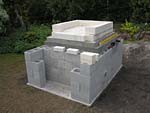
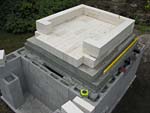
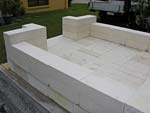
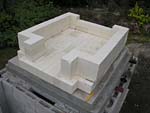
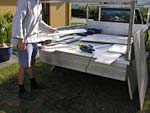
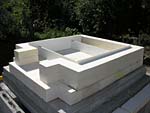
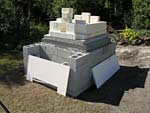
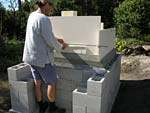
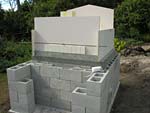
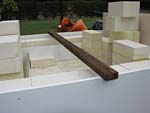
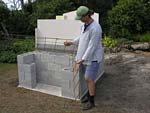


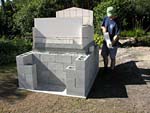
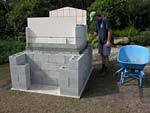
Firebrick walls. This page contains 79 images focused on making “MTo firebrick walls”.
Complete firebrick part building sequence has 613 (out of 2,785 all up) images: #0697 – #1309
Firebrick oven stages: Floor – Walls – Arches – Dome Entrance
3G MTo main page.
There are also the Swishy oven and Original MTo designs.
Respond to the MTo firebrick Walls part 1/3 building sequence article:
18 Comments
Sorry, the comment form is closed at this time.
Thanks Rado, Downloads successful.
Just a quick question, do you have any plans or instructions on building igloo style pizza ovens?
Thanks and regards,
Ralph
added by Rado:
Hi Ralph,
I haven’t build igloo shape oven for a very long time now (it was sort of avocado shape), but if you prefer that shape you can normally place it in the 3G MTo structure instead of this barrel shape firebrick part. If that was the case you could easily make it wider by one full cement block too, to fit the circle/radius on the widen surface when making the block walls:
https://www.traditionaloven.com/1353/raising-concrete-block-walls
… plus of course add the extra width to the concrete ground slab width, reflecting either the 1/2 block or full block size length (I would go with the one full block):
https://www.traditionaloven.com/1342/making-small-concrete-slab-mto
All other matters remain the same except the different total structure width and dome style.
Warmly,
Rado
By Ralph
Hi Rado,
I have laid out a hearth size of 45 inches wide by 54.5 inches long, inside dimensions. I’m having a hard time scribing the arc for a 16 inch dome height. Is there a simple formula for this, or do I need to change the width?
Thanks!
Jim in Costa Rica
By Jim Aoki
Hi Jim,
No need to change the width if you have it already calculated as you prefer. Simply create the arch with walls sample on a garage floor for example, to measure and to see it in real clearly. Now, internally speaking, if the tip of the arch was higher than those 16 inch total vault – simply sort of push down to center firebricks of the arch while also expending the sides of the arch (expanding only the arch sides not the walls.) This will create a beautiful kind of elliptical arch shape, that’s positive.
If you have my original MTo design, got to its folder and inside of the folder there is one sub-folder. In there it’s the low-set build oven (sitting on the ground on an elevated land). Have a look this oven has the same elliptical arch shape. Also, the low oven is actually used for business.
Send me some photos of how you go about your project, I will comment back. Thank you. Costa Rica seem as a gr8 place doesn’t it?
With compliments.
Rado
PS – My reply is delayed, it was hectic here in Queensland recently due to the floods. We were helping Mate, one-off thing to do, no power neither Internet there yet (not too pretty situation but much better than back in time in 2011.)
By Rado
Hi Rado,
Sorry, I wanted the files for the round, igloo type pizza oven. Is this included in the building plans?
Robert
By Robert
Hi Robert,
Onto the 3G MTo design you can actually place on any firebrick part shape and of course also the igloo round or avocado shape. The structure was designed for any dome and also commercial kits fit in. But I do not build igloo shape domes, it’s easy though, just make sure firebricks are cut as to keying them one to the other so the dome holds for long. See this page about igloo versus rectangle floor for all details needed for spherical firebrick part work, just read it all is on the page.
By Rado
Hey Rado,
I am in the US (Louisiana) and in the process of building the 3G MTo oven. Is there an area of drawing that gives the dimensions of the actual cooking surface? I am getting ready to go up with walls of oven and looking at pics on the disc. I received the disc some time ago and am finally getting around to building oven and can’t wait to cook up come custom seafood pizza’s with our fresh LA seafood. I don’t know if I should have had diagrams with measurements with the dimensions? Please advise. I see you drawing and measuring and I don ‘t have any diagram. I am a novice when it comes to construction, so please advise!!?
Jonathan
By Jonathan
Hi Jonathan,
thanks for the question. The 3G MTo material list and the needed pdf files with diagrams for the brick & block work are all on this page of this oven building.
By Rado
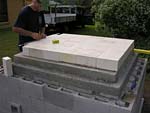
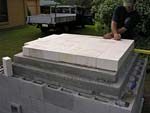
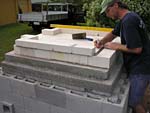
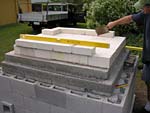
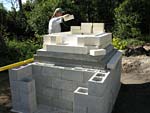
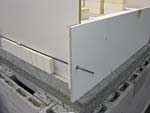
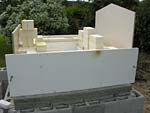
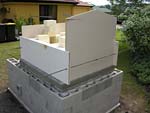
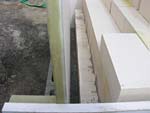
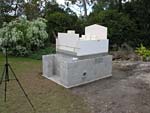
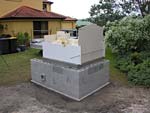
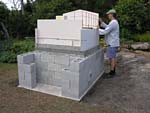
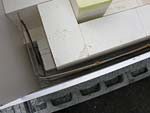
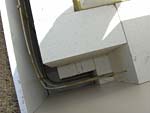
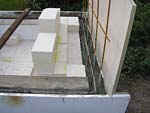
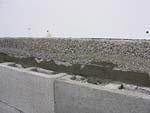
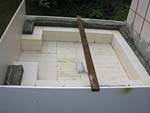
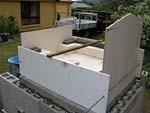
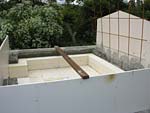
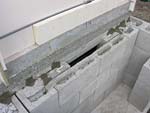
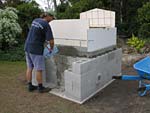
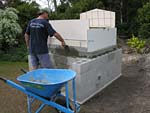
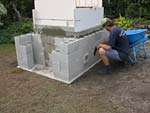
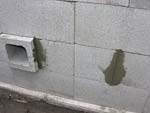
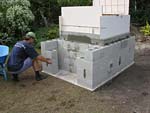
I have your CD and looked at your pictures endlessly. I do not see an explanation as to what you are pouring between the firebrick low walls and the wooden temporary walls. You have put a metal mesh in there. Is this regular cement? Or is it all refractory mortar? Or is it an insulation layer of vermiculite? I am stumped. Please help.
By David Ries
Hi David,
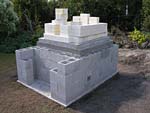
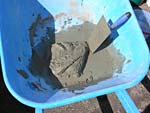
Thanks for question. Between these firebrick walls and the temporary boxing towards the out-side of the oven chamber – the same dense concrete mix goes there as is used for making the concrete cladding layer, or the top hearth slab on which the firebrick hearth goes. This section is part of the concrete cladding too. 4:1:1 mixing ratio. Example photo for others, look at the image 3rd-mto_0887 or the other few images around this one.
By Rado
Thak you for your help. Another question. Is there aluminum foil used on the lower area ? in other words, in the area between the firebrick lower walls and the temporary boxing. It doen’t seem like it in your pictures. You only used th aluminum foil on the vault area?
As – if understand it correctly, there is no refractory mortar used in th firebrick walls, sides front or back? Refractory mortar is only used in the vault arches?
By David Ries
Rado,
A final question: After the main oven is done, and you start the front entrance arch, there is a gap between the oven and the new arches. The gap remains there while you are building the chinmey stack. Once the chimney is done, it appears that you dumped in some concrete or vermiculite insulation. Which one it is I can’t tell. I am inclined to pour in vermiculite in order to separate the heat of the concrete cladding layer and firebox from the non-refractory bricks etc of the front “pretty” entrance. Am I correct?
By David Ries
Hi David,
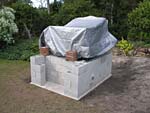
Sure. I put the foil only on top of the firebrick arches for these vault firebrick won’t bond with the fresh concrete, example image 3rd-mto_1337. Plus, this way the vault area will not absorb water from the soft concrete. Otherwise they would and quite rapidly so. On a side note, when the concrete of this vault surface sets, smooth it with metal trowel tool (like while making any other concrete surface, smoothing it till nearly set prevents surface drying cracking. Cover with plastic or crop with water for 24+ hours especially when hot and windy weather outside.) I also warm up the firebricks from the inside before the cladding layer is applied on top. Either with electric heater or small flame from a gas burner. Just to soak some warmth through the firebrick structure. By doing that the firebricks expand, only marginally though, however this allows for lesser pressure in the firebrick work ones heating the oven for cooking.
I never use the aluminum foil in walls. But if you wanted to play with it in this place as well you will not hurt anything at all.
Refractory mortar goes between firebrick in the arches. If however I get a batch of uneven firebricks, which sometimes happens with some suppliers, they are perfectly fine but then to work these gaps out I apply mortar everywhere including between firebricks in all walls, while turning the bricks around to get the best looking brick side towards the oven inside (no mortar goes into the hearth floor because any small gaps in this surface that might happen to be there these get filled and packed permanently with the ash real quickly.) In such a case, a commercial airset premix mortar is used, it can be applied very thinly, buttered onto firebrick which is the aim. See the lows set oven sitting on the ground (sample) which is in one subfolder the main original MTo design folder – that oven has mortared all walls and arches and has been used for business production.
I fill this gap with Vermiculite insulation, that works but may need reapplication down the road or at least checking if it needs a service or some retouching. A heat resistant rope gasket may be used also and then insulation over it.
By Rado
Rado,
Thanks for your information. I am still wondering about that gap. Why is it there? Is that where you have a gap for the ashes to fall? I am not installating an ash pit. So do I need a gap there anyway for some purpose related to heat transfer? If I had to do the oven over again, I would use Vermiculite instead of cement cladding on the area behind and on top of the front part of the oven arches, where the radius drops (the tunnel area). in other words, the last 6 inches or so of the tunnel area whould have vermiculite on the area behind the firebrick walls and on top of the lower arch. This will slow down heat transfer to the front of the oven where the door is at.
One adjustment I did make is to move the cooking area of the oven 1/2 brick closer to the front by cutting back the right angle firebrick where the vault area ends and the tunnel area begins. I’ll send a picture of it when I put the others together. I think it was a brilliant change.
By David Ries
Hi David,
By all means the oven can be built without the ash drop, ash pit, the cooking performance and firing functions of the oven will not be changed at all in any way. The ash drop gap has only one function, which is to drop the ashes into it, and then they are in a later time collected/removed and that’s it (apart this ash it does not contribute with anything else, it does not create any air flow etc.) But the ash can be very easily and fast removed by using a pizza paddle as well (see the page link below on this ash removal method). The ash drop is only a side feature some bakers can use if they prefer it, because the ash collection underneath will store ashes from ~50+ firings so things get easier in that aspect. How to easily and quickly remove ash with peels to clean ovens. I will me more than happy to see your images, of course, thanks!
By Rado
Hi Rado,
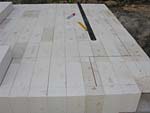
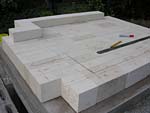
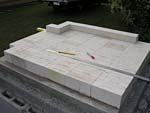
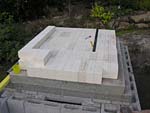
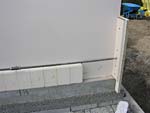
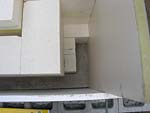
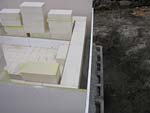
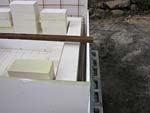
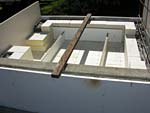
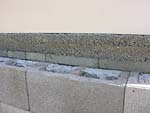
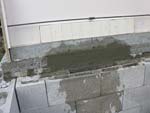
Quick question; when laying the first, second and third (in the case of the back) rows of fire bricks that make up the walls for the dome on top of the hearth it looks like you have a very thin layer of fire cement between the floor and the first row of the walls (no. 731) but no cement at all thereafter. Have I understood this correctly? Does the bind thus happen with the concrete wall on the outside? Is this done for reasons of heat expansion?
Also if I am understanding the sequence correctly I should have 34 inches between the walls (I am using 3 in THICK firebricks x 14″ x 6″ (WIDTH – LENGTH) for the hearth. Is that correct? Many thanks in advance for clarifying!
By Dara
Hi Rado,
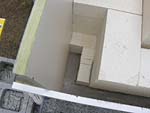
Pizza oven build going well in Dublin! Have already got the hearth in place and am just about to start on the walls and back of the pizza oven. Looking at the photos it seems that the first row of firebricks for the walls of the dome are held in place by fireclay. But it appears that the second layer just sit on top and are not fixed in place at all. Is this correct? Is it similar for the back of the oven? Thanks!
-Dara
By Dara
G’day Dara,
Yes it’s 34 inches internal oven width. But it’s easily changeable if you needed some adjustment/s.
In fact, you do not need to use refractory mortar at all between firebricks in the hearth and walls if your firebricks are nicely accurate, when the hearth is flat – except for the arches where the mortar goes. I didn’t have to but to be totally precise used a very thin mortar application under the first wall bricks to straighten them (the first raw of wall bricks) up on the floor. The concrete cladding holds the firebrick work in place and especially the arches, plus it adds to the thermal heat absorbing mass of course, that its functions, firebricks do not bond with this concrete. Waiting for your oven / meals photos.
By radko
G’day Dara,
Yes precisely. Please read my previous reply to your other comment for more details. Thanks.
By radko