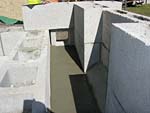
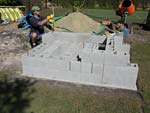
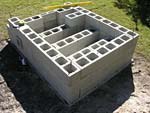
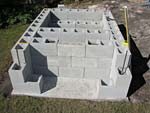
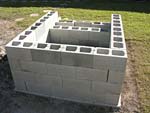
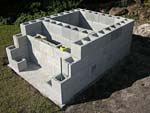
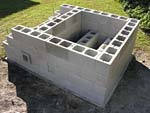
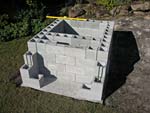
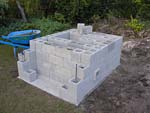
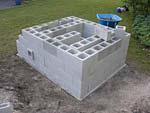
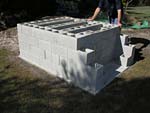
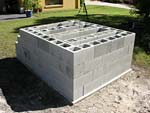
Raising cement block walls filled with concrete
Raising cement block walls. Dry-fit blocks, without mortar in between (similarly as with building dams for instance – it’s strong), then these cinder blocks are filled with concrete. But of course these blocks can also be mortared first, it is just up to a personal preference for how to go about that. Masterly Tail oven design (3G MTo) – 3G MTo Main Page
Pointers:
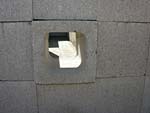
1. Even though this is great slick ash drop design, the ash slot isn’t necessary for the oven to perform well. It can be simply completely left out from the construction as ash can be cleaned out by removing it on a paddle, very easily. The function of this ash shoot is only to drop the ash and embers comfortably down when it is being raked out. Ash volume from 200+ firings can be accumulated in the ash storage area. While we are at it; heat up 4 or 5 times before cleaning the oven. (please don’t throw the ash to waste, instead spread it in a garden!)
2. Post here (below) exact dimensions of your common cement blocks. Full size, half size and quarter size blocks – the large size that I used and 1/3 thin. In inches or millimeters units. This is to workout exact slab dimension for the ground slab for oven builders in USA, Europe, Australia, Canada, New Zealand, Asia, Africa, South America, you name it where else.
3. Otherwise, the slab extends on each side 1″ – 25mm from the walls.
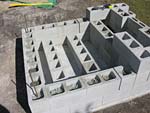
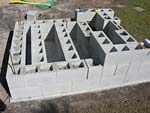
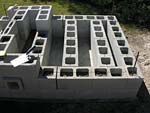
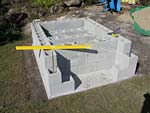
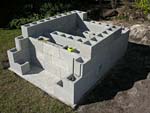
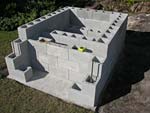
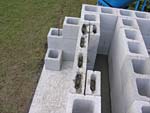
2. Raising block walls (and the slickest ash-drop design!)
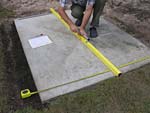
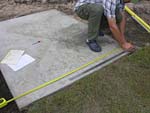

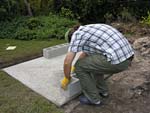
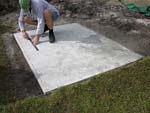
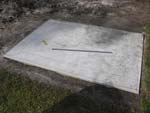
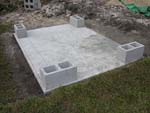
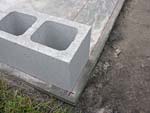

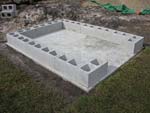
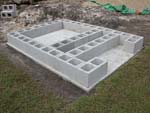
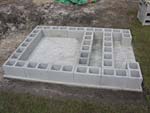
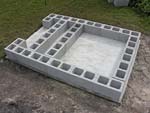
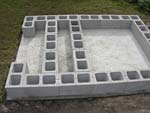
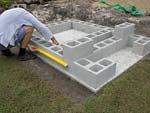
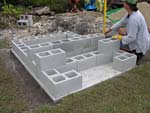
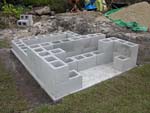
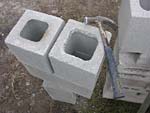
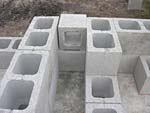
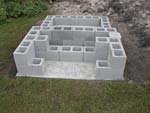
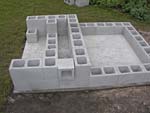
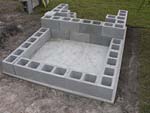
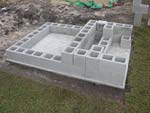
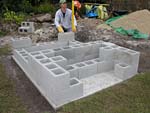

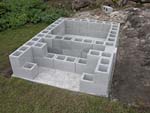
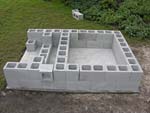
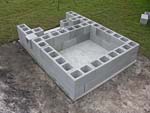
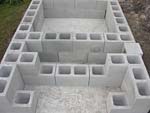
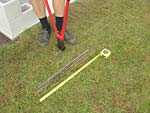
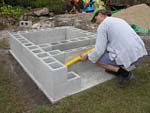
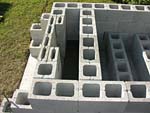
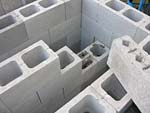
Image #0185 – cutting down one small left over wire mesh piece. These off-cuts will be used to strengthen concrete poured into the slim blocks.
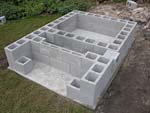
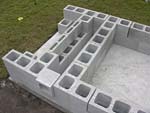
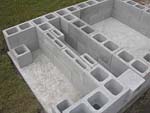
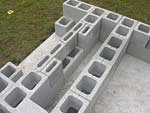
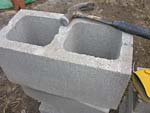
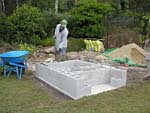
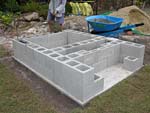


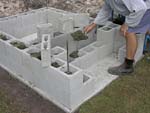
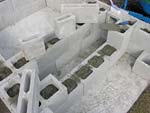
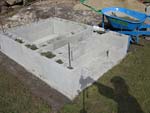
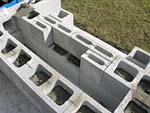
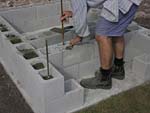
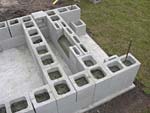
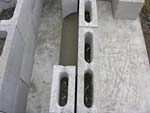
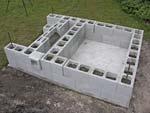
Image #0209 – Because the gap in them is narrower, to strengthen the concrete joints, inside these thin blocks you can see metal pieces from cut down wire mesh. Image #0185 above shows the mesh being cut.
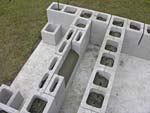
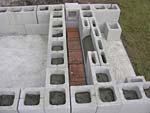
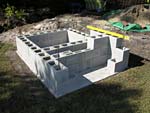
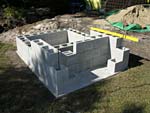
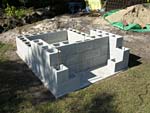
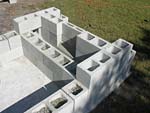
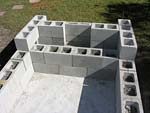
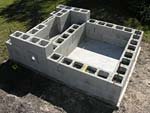
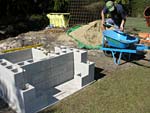
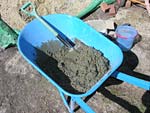
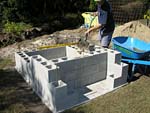
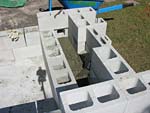
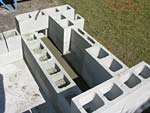
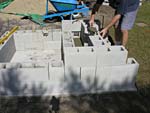

Image #0240 – for filling of all the slim blocks with concrete – because the opening in them is narrower; when I only have a concrete blend with large stones in it (sand with stones mix) to make my days easier first I sieve the larger stones out. Because only a small volume of concrete will be necessary for filling of these thin blocks, one bucket prepared ahead will last a long way – a photo describing the sieving is in the finishing-walls section.

Part 2 “how to raise cement block walls” contains 90/181 photos.
Total images 0141 – 0321 (out of 2,785 all up)
3G MTo main page.
There are also the Swishy oven and Original MTo designs to consider and to look at.
Respond to the Raising cement block walls filled with concrete article:
15 Comments
Sorry, the comment form is closed at this time.
Hi Rado – Thanks for posting the second round. Guessing the picture comments were jumbled as all pictures have the same comments as pic #142. Looks like an awesome oven. Looking to incorporate some of these compionents into my oven!
Cheers,
Roger
By Roger
Hi Roger,
For now it is only a generic note for each photo. I intend first to make pages for each stage, heaps of work with the images as there are so many. I have a week just for doing this. Then I will be writing text to describe individual them.
*** Please see the 2nd paragraphs under the pictures. I asked if you guys want to help with describing the images/stages, it would help a lot.
By Rado
Hi Rado,
I’m looking at picture #0300/0301 and am not understanding why you chose to use two thin blocks in the second layer here when in picture #0271, looking at the same row the day before, there was a full sized block in that space.
Is there a structural reason for the change?
added by Rado :
Hi Paul,
Thank you for the question. Real good spotting! There isn’t any structural reason for that; I simply needed to save one full size block. I was short by 1 full block right then so I simply replaced that one with the two thinner blocks instead and purchased these two next morning. It’s fine to do this here and there if you needed. Just ignore this instance.
Warmly,
Rado
By Paul
Hi Rado,
The picture sets you have are indcredible in their detail. I enjoy just browsing them all the time to memorize the steps and details that I can before starting.
I’m looking at picture #216 that shows you put red brick at the foundation for the ash slot. Why not just add a row of standard cinder block instead and cement over it to the opening?
Best,
Naeem
By Naeem Dowidar
Naeem,
I am sure Rado is just using those for filler, you could use blocks, but what ever you have around, that you never want to see again can go there :)
My oven is complete, I will send in pictures soon.
Thanks Rado!
Kenny
By Kenny
@Naeem – Image #0216 – as Kenny said before me, in there I used cheaper stuff I had laying around instead of new concrete blocks or extra amount of mixed concrete. The red bricks get fully hidden forever. But of course 3 blocks or higher concrete volume could have gone in here as well, although it’s not necessary. Therefore if you had plentiful of concrete blocks go for it by any means. Or with a half wheelbarrow of concrete amount left over you could fill it to create the whole ash storage surface with only pure concrete — all the way right from the ground slab no harm will be done apart a slight to the money budget.
@Kenny – thank you for answering. Your finished 3G MTo looks great, thanks for sending us its photos. They will be added into the gallery, obviously! I sent you reply, need the answer regarding how you went about the final cover so it can be mentioned on your gallery page. Looks great.
By Rado
Hi Rado, my existing slab I have is only 62″ wide and I want to use your 3G MTo design which uses 4 16″ blocks for its width. Can I still use this design by shortening the width to 62″ by taking 2″ off one of the blocks to fit four in the front wall and back wall or will this impact the size of the cooking surface and the dome?
If not, would it work structurally if I simply overhanged my bricks / blocks by one inch on both sides (7/8 of the brick would still be positioned on the slab)?
Thanks
By Jeff Meyer
Follow up on the previous questions; my cement blocks are 15 1/2 inches long (no 16″), so they will just fit on the slab perfectly. Reminds me of the saying, “measure twice, ….”
By Jeff Meyer
Hi Jeff,
I agree, measure twice, concrete ones. Yes the actual block is comes to 7-5/8″ x 7-5/8″ x 15-5/8″ so your MTo oven width will fit in nicely.
By Rado
Thank you Rado, what do you think of making the bottom walls on the oven with steel frame instead of cinder blocks?
By Ken
Hi Ken,
The oven may sit on a strong steel frame (the actual oven cooking part is very heavy so the frame needs to be made strong.) Nothing wrong nor difficult with using a nicely welded metal frame at all. Or a well designed frame and put together, assembled, with screws. Not much heat will soak downwards through the 4 inch thick insulation layer, just a bit of warmth. But it would be the best, and wise, to allow the frame in its entirety can be repainted in time, in a case some rust was developing. People do this often, even sometimes the oven can be lifted from the frame on which it sits.
By Rado
Thank you. I am a welder by trade. I just feel nervousness around concrete. The legs are 4x4x1/8 inch and the cross members 3x3x3/16 in. I will be sending a donation shortly for your help. Ken
By Ken
Hi Ken,
I enjoy welding. Perhaps if compared with your work … my welds are not as nice plus cleaning them takes longer than making them, but they sort of hold I could say :-)!
With compliments.
By Rado
I got the first two rows done today. I had them stacked last week, and found that to make the oven dimensions with our blocks here in the US, I had to stretch them apart and ended up with a 1.75 inch gap in the rows. I found that a 2 inch solid, which we’re using under the insulated hearth layer anyway, was just the right thickness, so I split some of them and they worked perfect.
I filled the cores today, it took 2 80lb and 15 60lb bags of sakrete to core fill all the block. Get a cement mixer. Just get one, it will make your life so much easier. I did the two 80lb bags by hand, I went yesterday and borrowed my buddies mixer. Made this an enjoyable morning rather than a miserable one.
Also, if you get a mixer, make sure your wheelbarrow fits under it. Mine didn’t so I ran to Farm and Fleet and bought a new one that did. I’m damned glad I checked before I mixed the concrete. Lessons learned for sure.
By Vince Nylin
Rado: I appreciate your work on the blocks, have sent for full plans. Sharing two thoughts:
First, we built an Alan Scott oven in 2000 with an ash drop just outside the door opening, rake the coals to the hole, thought it good, but the front is open and the material continues to burn, literally right under your nose. We have to remove the metal pan with hot ash or stand in hot smoke. Your chamber seems perfect, and any continuing fire will just burn out, no smoke in the face.
Second, Scott design called for 2″ foam insulation on top of plastic sheet, 6″ beyond all sides of the slap, then reinforced concrete slab. The insulation prevents the frost from heaving, so we avoided the work and expense of foundation below the 3.5′ deep Vermont frost line. No apparent problem in the first 17 years. Any thoughts on this approach if you also live in a cold freezing climate?
Tom Casten
By Thomas R Casten